Courgette / Zucchini, including Summer Squash

Cucurbita pepo subs. pepo – the name for all summer squash

Summer squash are a subspecies of the pepo species, a large group of plants that grow with the same timings and in similar ways.

Courgette / Zucchini, including Summer Squash

Introduction

This lesson has a lot of information about summer squash, using courgettes as the main example.

Summer squash are a subspecies of the pepo species, a large group of plants that grow with the same timings and in similar ways. Examples are Pattypan, Tromboncino, Crookneck and Straightneck. Sow these at the same time and use the same methods and spacings as I give here for courgettes or ‘zucchini’, which are also summer squash.

27th July – one plant of Twinkle F1 summer squash has been left unpicked for three weeks
  • Compared to varieties for winter, summer squash are eaten at an immature stage with soft skin.
  • They grow fast and crop copiously.
  • If summer squash are allowed to mature on the plant, their skin becomes hard.
  • Even with a hard skin, summer squash do not store nearly as long as winter squash, and their flesh is less sweet.
  • Most summer squash, including courgettes, make bushy plants, rather than the trailing plants of winter squash which are a different Cucurbita species – see Lesson 27  in Course 3B.
Striata – a long, thin courgette variety
An early summer courgette flower on 3rd June, when plants are free from mildew disease
4th June – mixed varieties of courgette plants and a winter squash plant on the far left; this gives an idea of spacing

The harvest time and method is to cut small fruits when they are tender. They are babies and immature, with no seeds inside. If you allow them to grow more, then seeds develop, flavours change and courgettes, for example, transform into marrows.

You can harvest most summer squash fruits at the stage about halfway between baby and hard-skinned. The flavour becomes less sweet but richer in other ways. I suggest you have fun trying harvests of different sized fruits, to find out how you like them most.

There is no special soil preparation, except perhaps a little more compost than for other vegetables. At Homeacres I add nothing extra to the squash beds, compared to, say, a bed for carrots. Nonetheless, fast growth and greedy roots mean these plants like nothing better than growing on a compost heap or pile of manure.

Late April – planting an early courgette plant in a half-mature compost heap
18th July – the same plant on the heap of ripening compost was not quite as early as I had hoped
August – early Gem F1 courgettes that have grown into marrows, on top of a heap of 18-month-old cow manure

Important note on courgettes

If your courgettes ever taste noticeably bitter, they may contain toxic cucurbitacins. Poisonous courgettes were reported in a few UK gardens in 2020, apparently from bad seed stock which had been sold by as many as three different seed companies.  The variety was Zucchini F1, best avoided.

  • Plants grow abnormally with more leaf than fruit – this would be one sign to alert you.
  • Such a poison is exceptionally rare and I absolutely do not want you to be discouraged from growing these amazing vegetables. Just watch out for those signs of imbalanced growth, and for fruits that taste so bitter that they are disgusting.
  • If a courgette plant’s growth habit is normal, as you see in the photos here, then there is nothing to worry about.

Harvest period

  • Days from seed to first harvest: 50–75
  • Best climate is warm, not too dry, can be hot.
  • They are annuals, killed by frost.
An extreme solution for frost protection on this plant
These courgettes were fleeced when planted in May on a morning with a light frost; now, by 13th June, they’re still protected because it’s a cool wet summer

Why grow them

An important bonus of homegrown, as opposed to bought courgettes, is that you can choose the size of fruit you like. If, for example, you enjoy them really small, then you can pick them really small!

Plants grow at a rapid rate, such that, from just one, you can expect a regular and large supply of tasty fruit. The flavour and texture are best when they are fresh, so this is a huge advantage for homegrown.

There is also something iconic about the first bright yellow courgette flowers in late spring. They are almost tropical, suddenly there in your garden. They are one of my favourite sights of the season, a sign that summer has arrived.

  • The flowers are delicious to eat, for example when fried after being dipped in a little batter.
  • You can eat the male flowers as well.

Save space?

Plants quickly grow large, and in small gardens they may not be practical because of how much space they require. There is an option with one or two varieties to grow them up strings. The one I grew is Black Forest F1.

I tried this, and it worked for a while with some decent first harvests. However, I then found that the large, heavy leaves, when blowing in the wind, caused too much movement of the stem against the string and damaged it.

Even if you tie the stem to a stake, you have to be careful that the string does not rub into the stem. Stems are broader and more tender than their close relative, the cucumber.

  • Plants in a container, like the one below, need much water – at least every day in summer.
Late July – this Black Forest F1 courgette is thriving; it has string buried under the rootball
Mid-August – the same climbing courgette seventeen days later
Five days later, just before the stem broke – next time I would deleaf fifty per cent of the lower leaves

Suitable for containers/shade?

I would say not to grow in a container, because of how they grow so large. Or perhaps you can succeed with the vertical training, in which case regular removal of lower leaves makes it easier to support plants.

If you have something large, like an old bath, that would be an option, as long as you water frequently and copiously in hot weather.

Some varieties are called ‘compact’, such as Goldrush F1, but it’s a relative term.

  • Courgette plants can grow in shade, they will just grow more slowly.

Varieties

Have a browse of any catalogue or website for the immense range of harvest possibilities. Fruits can be long or round, green or yellow, and in many shades, with compact leaves at their centre or open habits. The latter are easier for finding fruits to pick.

  • Cocozelle grows long, thin and slightly striped courgettes on trailing plants. It’s sometimes called an ‘heirloom’ variety, which means that it has been around for a while. The term is not a mark of quality.
  • Defender and Tuscany F1 fruits are dark green, smooth and chunky on compact plants.
  • Early Gem F1 is prolific with light green fruits: I have grown this since 1983. The leaves are pretty with silver streaks.
  • Atena Polka and Soleil F1 are productive for yellow fruiting varieties. Note that they have a yellow colour in their leaves – it’s not a disease.
  • Eight Ball F1 grows round fruits, which you harvest at any size, from golf to tennis ball.
  • Custard White is a traditional pattypan bush plant with white, scalloped fruits. Sunburst and Twinkle F1 grow a mass of yellow pattypans – see the photo above.

Sow and propagate

Avoid sowing too early – there is little, if any, advantage. These plants thrive in warmth, growing so fast from sowing slightly later that they often overtake an early sowing, which may be struggling for lack of warmth and light.  You can save a lot of time and effort in this way.

In addition, early plantings are susceptible to slug damage because the slugs can sense they are struggling.

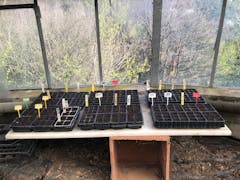
Sowing in these small modules first, for potting later on – cucumber and mostly courgette seeds; trialling different varieties
Ten days on from being sown in a 5 cm/2 in module, this courgette is ready to be potted on
When you see the lower leaves yellowing, it means there is a need for more nitrogen; when transplanting outside, no feeding will be required as roots explore the soil
  • Seeds germinate in five days at 24 °C/75 °F, longer if cool. They need a minimum of approx. 15 °C/60 °F.

Sowing conditions

You can germinate seeds with or without light, but they always need sufficient warmth. A dark and cosy cupboard in the house serves very well, as long as you bring out the germinating seedlings to light as soon as you see the first leaves growing.

Sowing time

Light levels are good by mid-spring, meaning there is warmth under cover. Seedlings are then likely to grow well, once germinated in the house. It needs about four weeks under cover at this time, between sowing and transplanting. This brings us to the transplant time in mid-May, when frosts are finished (but not everywhere).

Do check your last frost date, and adjust accordingly. In climates with no frost after mid-April, you could sow in mid-March. Or, where there are long and warm autumns, you can make a second sowing as late as early July/almost midsummer.

Speculative early sowings, which go against climatic averages, normally result in expensive and sorrowful failure. The gallery of photos below shows you one example of me being fortunate, thanks to an unusually frost-free and warm spring.

Early spring in 2011 – writing magazine articles encouraged me to try and sow courgettes early; these courgette plants are now already a week old on 29th April
Just one month later I was harvesting Defender F1 courgettes – I was pretty fortunate here, as this could have been a waste of time
By 19th June there were already plenty of courgettes to sell; you’ll notice the garlic on the left needs harvesting too

Sowing method

The seeds are large and they start well in 5 cm/2 in wide module cells. After about two weeks you need to enable more rapid growth, by moving (‘potting’) each module plant into a 7–10 cm /3–4 in pot.

  • They need full light.
  • They must not freeze at night, or they die.

Outdoor sowing is possible, a month later than under cover. This could be one week or so after the last frost date, to ensure that soil is warm enough. Sow two seeds per hole and thin to the strongest.

Transplant

Transplant size

Best growth comes from transplanting seedlings with one or two true leaves, preferably the latter if temperatures are still on the cool side. Plant roots are then more developed, helping growth to continue in conditions that may not be perfect.

Transplant time and method

If you use fleece as a cover above new transplants for about one week, there is no need to harden plants off when bringing them out of a greenhouse. This saves time, and a fleece cover speeds plant establishment.

  • The plants and roots are fragile – handle them carefully.
  • Make a hole with your trowel, just a little larger than the rootball, and set it so that the stem is buried 5 cm/2 in below surface level.
  • This results in a more stable plant, with roots more likely to stay moist.

Then water in well, unless it’s about to rain.

If you do transplant before your normal last frost date, have some fleece to hand in case of a frosty night. I did this in 2020 and it worked, just, though it was extra work for what was actually quite a small gain.

2nd May – these Cocozelle courgettes were sown on 12th April and are now ready to transplant
Early May – straight after transplanting I covered the plants with fleece over hoops, as they are tender at this stage
12th May – just about weathering a -2 °C/28° F frost under an extra layer of fleece

Spacing

Generous spacing allows plants to produce for longer, even right up to October, well into autumn.

1 m/39 in is a good average space between plants, or 75 cm/30 in for cropping through summer only – see the ‘Clearing’ section below.

Interplant

For mid-spring plantings, you have the option to set plants between vegetables and herbs that will finish soon. In the photo below you can see coriander and dill as an example; other possibilities are overwintered lettuce, spinach, and salad onions – anything that will finish cropping within two or three weeks and that does not mind the warmth of a fleece cover perhaps.

When it comes to twisting out the old plants, you may need to spread some compost or any organic matter around the new courgette plants, depending on when you added the last batch of mulch.

17th May – courgettes interplanted between coriander and dill
The same bed a few months later in mid-August, showing the El Greco variety in full health and production

Water

How often

In dry weather, water is the main constraint to growth – water every two to three days, with a decent amount.

When it’s hot and roots are moist, each plant can produce one, or even two courgettes every day. Hence the value of organic matter which holds water like a sponge.

  • If you are feeling overwhelmed by the number of harvests, you can reduce them simply by watering less.
  • This puts your plants into survival mode, where they stay alive but do not produce many new fruits.

In dry summers, the vegetables in adjacent beds give a vivid demonstration of how much water is needed by squash plants, and how good they are at finding it! The photos below show a strong difference in growth between neighbouring plants, according to how close they are to the courgette plants. The latter have grown moisture-seeking roots under the pathway and into the next bed.

The roots of these courgette plants have grown under the path and are pulling moisture from the beetroot plants, of smaller size and near the path
Mid-August – see how the leeks closest to the courgette plants are much smaller than the row to the left
During hot weather in mid-June, we spread a grass mulch between the courgette plants to retain moisture; soon after that it rained!

Extra mulch to retain moisture?

Courgettes can grow with half-rotted material on the surface, which conserves extra moisture. Then, by autumn, it has become more decomposed and like normal compost, suitable for the next plantings. This applies to all squash and pumpkin plants, and if you have problems with weed growth, it’s worth a try.

  • In cooler climates, I recommend you apply undecomposed mulches a week or two after transplanting.
  • They keep soil cooler by reducing the amount of sun reaching it, and can harbour pests which would then eat new plantings.

Mulch to smother vigorous weeds

A variation is using polythene to smother a thick amount of weeds in late winter. I also spread some old, but not perfectly decomposed manure on the surface.

The wide spacing of squash plants is ideal for this purpose, because it means only a few holes are needed in the plastic.

  • When it rains, water runs across the top and into the planting holes, so this method conserves moisture in the end.
  • At the same time weeds are dying, and you have food to eat.
Some no dig weed control – on 23rd May, I transplanted these courgettes into holes in polythene, in compost lying over now-dying weeds, including bindweed
The same plants on 15th June – see the natural grey flecks, a varietal trait of Early Gem rather than any disease

Leaf removal

This is an option, but it is not necessary. If you don’t like the look of leaves covered in white powdery mildew, simply cut them off – see the photos in ‘Problems’ below.

However, a snag is the spines on many stems and leaves, of courgettes in particular. It’s a job for the early morning, when you are clothed in long sleeves, and I suggest wearing gloves as well. I almost never wear gloves in the garden, but I always do for this – see ‘How to pick’ below.

Harvest times and methods

How to judge readiness

As soon as you see the first baby fruits on a recent planting, I recommend you cut them off to compost. They usually look dark, with dry skin, and cannot grow into anything decent.

  • Plants at this stage of growth simply do not have sufficient roots and resources to grow fruits of decent size.
  • Removing the first tiny fruits will speed up the development and growth of healthy ones.

Control the size of fruits at harvest by picking them either very small or allowing them to grow towards being mature and larger. They taste different at all stages – it’s a matter of taste and opinion. Try some both small and large, to discover which size you prefer.

An impressive harvest in early June – leaving flowers on baby courgettes adds value and flavour
Harvests of 15th July – fruits store much better when their stalks are left intact, so, if you’re not planning to eat them immediately, cut the stalk rather than snap courgettes
Be warned – this is what happens if you stop picking Goldrush F1 in September!

How to pick

Use a knife to cut through the stems of courgettes, rather than snapping them off: they will store better. When cutting courgettes, be careful not to cut into the plant’s main stem because it can quickly rot if damaged.

Maybe wear gloves and long sleeves when picking, because the rough spines, on the stems of courgette leaves in particular, can cause continual itching of the skin on some people, myself included.

When to pick and how often

If feeling overwhelmed by the quantity of harvest, best pick small to reduce the weight you gather. That means at least every two days, or every day when hot.

29th May – courgette plants 27 days after being planted; they are close to flowering and will be fruiting by early June
25th June – this Cocozelle open-pollinated variety of courgette has been cropping for two weeks; notice quite normal flower decay on the older courgette
31st October – in a warm autumn, Early Gem are still growing, with a selection of young and old fruits; this shows how plants can keep fruiting, even at six and a half months old

Storing

Courgettes and summer squash are mostly water and have soft skins, so they don’t store nearly as well as winter squash. Nonetheless, it’s possible to keep them for a week in the fridge or maybe three days at ambient temperature, after which they turn soft and rubbery, sometimes misshapen too.

Saving seed

On the face of it, this is easy, because you simply allow fruit to mature and develop a hard skin, probably of a darker colour, and viable seeds are then inside. The question, however, is what the flowers may or may not have cross-pollinated with.

  • Cross-pollination does not affect the appearance or flavour of fruits.
  • It does affect the genetic information inside seeds.

If you are growing different varieties of summer squash, they will probably cross-pollinate. This may not worry you when saving seed, if you feel adventurous and don’t mind next year’s fruits being of an unpredictable shape and colour.

To grow seeds of genetic purity that are true to the variety, you need to hand pollinate, before any insect pollinates the female flower.

  1. Place a paper bag, with a rubber band around its opening, over any female flower you may want to pollinate. The rubber band goes around the baby fruit, the flower is in the bag.
  2. Do this before the flower opens.
  3. Then do your pollination with a male flower against the female, once you see it open (you need to remove bag daily to check).
  4. Now put the paper bag back until the flower has died.

See Real Seeds for more information.

Potential problems

Which pests are likely, and when

Slugs like eating young plants, but mainly when they are weak from being transplanted too early.

  • If your garden is prone to slugs, I would sow later in spring, in May rather than April.

Interestingly, I have no other pests to report! In parts of the USA I hear about squash borers. I’m afraid I cannot advise on them, but I suspect that plants need a mesh cover – not practical for the regular picking however!

Other likely difficulties

Powdery mildew

From July or midsummer, you will notice white powdery mildew on the lower leaves. This is not as worrying as it appears and normally does not prevent new growth. You can cut off the mildewed leaves, wearing gloves, and plants will look nicer without necessarily growing better.

  • In my experience, the mildew is a natural dieback of older leaves that are not needed by the plants any more. Not everyone agrees with this.
Courgettes in late July, before removing leaves with mildew on
That same day, 30th July – we have deleafed the courgette plants, and this one was less stable for a while because it was reclining on older leaves
Still on the same day – this is how the whole bed looked after removing half of the leaves

Pollination

Pollination may not occur if you are in a district with few insects, maybe as a result of aerial mosquito sprays, or farmers killing insects in nearby fields. The sign of this will be fruits simply not developing and dropping off when tiny. This does not apply to those very first tiny fruits which I mentioned above.

If fruits are not developing, your best option is hand pollination – see ‘Saving seed’ above.

25th June, before the mildew arrives – I have no worries about the natural grey flecks on the leaves of this Defender F1 courgette, which has been cropping for a week
12th July – this beautiful courgette flower is on a plant that is starting to suffer from mildew
It’s not just us enjoying the flowers – this bee is having a great time in a female bloom
In my hand is a courgette with its female flower; all fruits have the dying petals of female flowers as they grow
There is a small male flower on the left, which is about in the middle, heightwise; generally, male flowers are not significant

And finally

Clear

Towards the end of summer, you will probably find that it is less appealing to eat courgettes and squash every day than it was in early summer! They have a justified reputation for overwhelming us with their abundance.

Despite this, I used to be attached to my plants until they were killed by frost. I had the feeling that they represented summer lingering, ahead of colder and darker days.

  • Frost does at least make clearing easy, because it converts a large plant into a few fibres – it’s quite a remarkable transformation.

Over succeeding years I have come to appreciate that there are more interesting possibilities for plantings in early autumn, after removing courgette plants at the end of summer. The choice is yours, and it is a nice option to have.

I suggest using a long-handled sharp spade to cut through the main stem at ground level, leaving all roots in the ground. Carry the plant to your compost heap and squash it down, always being careful not to let the spines rub your skin. Now simply rake the ground level – probably also necessary to water it thoroughly – and set out your new transplants.

By 30th August, these courgettes are now ready to clear. They are still cropping but are overpowering other nearby vegetables, and we have plenty of other harvests
Six days later, the courgette plants have been cleared from the bed to the right, which is now planted with small endive and mustard transplants

Follow with

There are several vegetables that can be transplanted through early autumn (much better than sowing direct), such as endives, salad rocket and Oriental leaves. By mid-autumn, the best options change, to transplants for overwintering as small plants. Examples are salad onions, lettuce and spring cabbage.

Courgette / Zucchini, including Summer Squash

Cucurbita pepo subs. pepo – the name for all summer squash

Summer squash are a subspecies of the pepo species, a large group of plants that grow with the same timings and in similar ways.

Courgette / Zucchini, including Summer Squash

Introduction

This lesson has a lot of information about summer squash, using courgettes as the main example.

Summer squash are a subspecies of the pepo species, a large group of plants that grow with the same timings and in similar ways. Examples are Pattypan, Tromboncino, Crookneck and Straightneck. Sow these at the same time and use the same methods and spacings as I give here for courgettes or ‘zucchini’, which are also summer squash.

27th July – one plant of Twinkle F1 summer squash has been left unpicked for three weeks
  • Compared to varieties for winter, summer squash are eaten at an immature stage with soft skin.
  • They grow fast and crop copiously.
  • If summer squash are allowed to mature on the plant, their skin becomes hard.
  • Even with a hard skin, summer squash do not store nearly as long as winter squash, and their flesh is less sweet.
  • Most summer squash, including courgettes, make bushy plants, rather than the trailing plants of winter squash which are a different Cucurbita species – see Lesson 27  in Course 3B.
Striata – a long, thin courgette variety
An early summer courgette flower on 3rd June, when plants are free from mildew disease
4th June – mixed varieties of courgette plants and a winter squash plant on the far left; this gives an idea of spacing

The harvest time and method is to cut small fruits when they are tender. They are babies and immature, with no seeds inside. If you allow them to grow more, then seeds develop, flavours change and courgettes, for example, transform into marrows.

You can harvest most summer squash fruits at the stage about halfway between baby and hard-skinned. The flavour becomes less sweet but richer in other ways. I suggest you have fun trying harvests of different sized fruits, to find out how you like them most.

There is no special soil preparation, except perhaps a little more compost than for other vegetables. At Homeacres I add nothing extra to the squash beds, compared to, say, a bed for carrots. Nonetheless, fast growth and greedy roots mean these plants like nothing better than growing on a compost heap or pile of manure.

Late April – planting an early courgette plant in a half-mature compost heap
18th July – the same plant on the heap of ripening compost was not quite as early as I had hoped
August – early Gem F1 courgettes that have grown into marrows, on top of a heap of 18-month-old cow manure

Important note on courgettes

If your courgettes ever taste noticeably bitter, they may contain toxic cucurbitacins. Poisonous courgettes were reported in a few UK gardens in 2020, apparently from bad seed stock which had been sold by as many as three different seed companies.  The variety was Zucchini F1, best avoided.

  • Plants grow abnormally with more leaf than fruit – this would be one sign to alert you.
  • Such a poison is exceptionally rare and I absolutely do not want you to be discouraged from growing these amazing vegetables. Just watch out for those signs of imbalanced growth, and for fruits that taste so bitter that they are disgusting.
  • If a courgette plant’s growth habit is normal, as you see in the photos here, then there is nothing to worry about.

Harvest period

  • Days from seed to first harvest: 50–75
  • Best climate is warm, not too dry, can be hot.
  • They are annuals, killed by frost.
An extreme solution for frost protection on this plant
These courgettes were fleeced when planted in May on a morning with a light frost; now, by 13th June, they’re still protected because it’s a cool wet summer

Why grow them

An important bonus of homegrown, as opposed to bought courgettes, is that you can choose the size of fruit you like. If, for example, you enjoy them really small, then you can pick them really small!

Plants grow at a rapid rate, such that, from just one, you can expect a regular and large supply of tasty fruit. The flavour and texture are best when they are fresh, so this is a huge advantage for homegrown.

There is also something iconic about the first bright yellow courgette flowers in late spring. They are almost tropical, suddenly there in your garden. They are one of my favourite sights of the season, a sign that summer has arrived.

  • The flowers are delicious to eat, for example when fried after being dipped in a little batter.
  • You can eat the male flowers as well.

Save space?

Plants quickly grow large, and in small gardens they may not be practical because of how much space they require. There is an option with one or two varieties to grow them up strings. The one I grew is Black Forest F1.

I tried this, and it worked for a while with some decent first harvests. However, I then found that the large, heavy leaves, when blowing in the wind, caused too much movement of the stem against the string and damaged it.

Even if you tie the stem to a stake, you have to be careful that the string does not rub into the stem. Stems are broader and more tender than their close relative, the cucumber.

  • Plants in a container, like the one below, need much water – at least every day in summer.
Late July – this Black Forest F1 courgette is thriving; it has string buried under the rootball
Mid-August – the same climbing courgette seventeen days later
Five days later, just before the stem broke – next time I would deleaf fifty per cent of the lower leaves

Suitable for containers/shade?

I would say not to grow in a container, because of how they grow so large. Or perhaps you can succeed with the vertical training, in which case regular removal of lower leaves makes it easier to support plants.

If you have something large, like an old bath, that would be an option, as long as you water frequently and copiously in hot weather.

Some varieties are called ‘compact’, such as Goldrush F1, but it’s a relative term.

  • Courgette plants can grow in shade, they will just grow more slowly.

Varieties

Have a browse of any catalogue or website for the immense range of harvest possibilities. Fruits can be long or round, green or yellow, and in many shades, with compact leaves at their centre or open habits. The latter are easier for finding fruits to pick.

  • Cocozelle grows long, thin and slightly striped courgettes on trailing plants. It’s sometimes called an ‘heirloom’ variety, which means that it has been around for a while. The term is not a mark of quality.
  • Defender and Tuscany F1 fruits are dark green, smooth and chunky on compact plants.
  • Early Gem F1 is prolific with light green fruits: I have grown this since 1983. The leaves are pretty with silver streaks.
  • Atena Polka and Soleil F1 are productive for yellow fruiting varieties. Note that they have a yellow colour in their leaves – it’s not a disease.
  • Eight Ball F1 grows round fruits, which you harvest at any size, from golf to tennis ball.
  • Custard White is a traditional pattypan bush plant with white, scalloped fruits. Sunburst and Twinkle F1 grow a mass of yellow pattypans – see the photo above.

Sow and propagate

Avoid sowing too early – there is little, if any, advantage. These plants thrive in warmth, growing so fast from sowing slightly later that they often overtake an early sowing, which may be struggling for lack of warmth and light.  You can save a lot of time and effort in this way.

In addition, early plantings are susceptible to slug damage because the slugs can sense they are struggling.

Sowing in these small modules first, for potting later on – cucumber and mostly courgette seeds; trialling different varieties
Ten days on from being sown in a 5 cm/2 in module, this courgette is ready to be potted on
When you see the lower leaves yellowing, it means there is a need for more nitrogen; when transplanting outside, no feeding will be required as roots explore the soil
  • Seeds germinate in five days at 24 °C/75 °F, longer if cool. They need a minimum of approx. 15 °C/60 °F.

Sowing conditions

You can germinate seeds with or without light, but they always need sufficient warmth. A dark and cosy cupboard in the house serves very well, as long as you bring out the germinating seedlings to light as soon as you see the first leaves growing.

Sowing time

Light levels are good by mid-spring, meaning there is warmth under cover. Seedlings are then likely to grow well, once germinated in the house. It needs about four weeks under cover at this time, between sowing and transplanting. This brings us to the transplant time in mid-May, when frosts are finished (but not everywhere).

Do check your last frost date, and adjust accordingly. In climates with no frost after mid-April, you could sow in mid-March. Or, where there are long and warm autumns, you can make a second sowing as late as early July/almost midsummer.

Speculative early sowings, which go against climatic averages, normally result in expensive and sorrowful failure. The gallery of photos below shows you one example of me being fortunate, thanks to an unusually frost-free and warm spring.

Early spring in 2011 – writing magazine articles encouraged me to try and sow courgettes early; these courgette plants are now already a week old on 29th April
Just one month later I was harvesting Defender F1 courgettes – I was pretty fortunate here, as this could have been a waste of time
By 19th June there were already plenty of courgettes to sell; you’ll notice the garlic on the left needs harvesting too

Sowing method

The seeds are large and they start well in 5 cm/2 in wide module cells. After about two weeks you need to enable more rapid growth, by moving (‘potting’) each module plant into a 7–10 cm /3–4 in pot.

  • They need full light.
  • They must not freeze at night, or they die.

Outdoor sowing is possible, a month later than under cover. This could be one week or so after the last frost date, to ensure that soil is warm enough. Sow two seeds per hole and thin to the strongest.

Transplant

Transplant size

Best growth comes from transplanting seedlings with one or two true leaves, preferably the latter if temperatures are still on the cool side. Plant roots are then more developed, helping growth to continue in conditions that may not be perfect.

Transplant time and method

If you use fleece as a cover above new transplants for about one week, there is no need to harden plants off when bringing them out of a greenhouse. This saves time, and a fleece cover speeds plant establishment.

  • The plants and roots are fragile – handle them carefully.
  • Make a hole with your trowel, just a little larger than the rootball, and set it so that the stem is buried 5 cm/2 in below surface level.
  • This results in a more stable plant, with roots more likely to stay moist.

Then water in well, unless it’s about to rain.

If you do transplant before your normal last frost date, have some fleece to hand in case of a frosty night. I did this in 2020 and it worked, just, though it was extra work for what was actually quite a small gain.

2nd May – these Cocozelle courgettes were sown on 12th April and are now ready to transplant
Early May – straight after transplanting I covered the plants with fleece over hoops, as they are tender at this stage
12th May – just about weathering a -2 °C/28° F frost under an extra layer of fleece

Spacing

Generous spacing allows plants to produce for longer, even right up to October, well into autumn.

1 m/39 in is a good average space between plants, or 75 cm/30 in for cropping through summer only – see the ‘Clearing’ section below.

Interplant

For mid-spring plantings, you have the option to set plants between vegetables and herbs that will finish soon. In the photo below you can see coriander and dill as an example; other possibilities are overwintered lettuce, spinach, and salad onions – anything that will finish cropping within two or three weeks and that does not mind the warmth of a fleece cover perhaps.

When it comes to twisting out the old plants, you may need to spread some compost or any organic matter around the new courgette plants, depending on when you added the last batch of mulch.

17th May – courgettes interplanted between coriander and dill
The same bed a few months later in mid-August, showing the El Greco variety in full health and production

Water

How often

In dry weather, water is the main constraint to growth – water every two to three days, with a decent amount.

When it’s hot and roots are moist, each plant can produce one, or even two courgettes every day. Hence the value of organic matter which holds water like a sponge.

  • If you are feeling overwhelmed by the number of harvests, you can reduce them simply by watering less.
  • This puts your plants into survival mode, where they stay alive but do not produce many new fruits.

In dry summers, the vegetables in adjacent beds give a vivid demonstration of how much water is needed by squash plants, and how good they are at finding it! The photos below show a strong difference in growth between neighbouring plants, according to how close they are to the courgette plants. The latter have grown moisture-seeking roots under the pathway and into the next bed.

The roots of these courgette plants have grown under the path and are pulling moisture from the beetroot plants, of smaller size and near the path
Mid-August – see how the leeks closest to the courgette plants are much smaller than the row to the left
During hot weather in mid-June, we spread a grass mulch between the courgette plants to retain moisture; soon after that it rained!

Extra mulch to retain moisture?

Courgettes can grow with half-rotted material on the surface, which conserves extra moisture. Then, by autumn, it has become more decomposed and like normal compost, suitable for the next plantings. This applies to all squash and pumpkin plants, and if you have problems with weed growth, it’s worth a try.

  • In cooler climates, I recommend you apply undecomposed mulches a week or two after transplanting.
  • They keep soil cooler by reducing the amount of sun reaching it, and can harbour pests which would then eat new plantings.

Mulch to smother vigorous weeds

A variation is using polythene to smother a thick amount of weeds in late winter. I also spread some old, but not perfectly decomposed manure on the surface.

The wide spacing of squash plants is ideal for this purpose, because it means only a few holes are needed in the plastic.

  • When it rains, water runs across the top and into the planting holes, so this method conserves moisture in the end.
  • At the same time weeds are dying, and you have food to eat.
Some no dig weed control – on 23rd May, I transplanted these courgettes into holes in polythene, in compost lying over now-dying weeds, including bindweed
The same plants on 15th June – see the natural grey flecks, a varietal trait of Early Gem rather than any disease

Leaf removal

This is an option, but it is not necessary. If you don’t like the look of leaves covered in white powdery mildew, simply cut them off – see the photos in ‘Problems’ below.

However, a snag is the spines on many stems and leaves, of courgettes in particular. It’s a job for the early morning, when you are clothed in long sleeves, and I suggest wearing gloves as well. I almost never wear gloves in the garden, but I always do for this – see ‘How to pick’ below.

Harvest times and methods

How to judge readiness

As soon as you see the first baby fruits on a recent planting, I recommend you cut them off to compost. They usually look dark, with dry skin, and cannot grow into anything decent.

  • Plants at this stage of growth simply do not have sufficient roots and resources to grow fruits of decent size.
  • Removing the first tiny fruits will speed up the development and growth of healthy ones.

Control the size of fruits at harvest by picking them either very small or allowing them to grow towards being mature and larger. They taste different at all stages – it’s a matter of taste and opinion. Try some both small and large, to discover which size you prefer.

An impressive harvest in early June – leaving flowers on baby courgettes adds value and flavour
Harvests of 15th July – fruits store much better when their stalks are left intact, so, if you’re not planning to eat them immediately, cut the stalk rather than snap courgettes
Be warned – this is what happens if you stop picking Goldrush F1 in September!

How to pick

Use a knife to cut through the stems of courgettes, rather than snapping them off: they will store better. When cutting courgettes, be careful not to cut into the plant’s main stem because it can quickly rot if damaged.

Maybe wear gloves and long sleeves when picking, because the rough spines, on the stems of courgette leaves in particular, can cause continual itching of the skin on some people, myself included.

When to pick and how often

If feeling overwhelmed by the quantity of harvest, best pick small to reduce the weight you gather. That means at least every two days, or every day when hot.

29th May – courgette plants 27 days after being planted; they are close to flowering and will be fruiting by early June
25th June – this Cocozelle open-pollinated variety of courgette has been cropping for two weeks; notice quite normal flower decay on the older courgette
31st October – in a warm autumn, Early Gem are still growing, with a selection of young and old fruits; this shows how plants can keep fruiting, even at six and a half months old

Storing

Courgettes and summer squash are mostly water and have soft skins, so they don’t store nearly as well as winter squash. Nonetheless, it’s possible to keep them for a week in the fridge or maybe three days at ambient temperature, after which they turn soft and rubbery, sometimes misshapen too.

Saving seed

On the face of it, this is easy, because you simply allow fruit to mature and develop a hard skin, probably of a darker colour, and viable seeds are then inside. The question, however, is what the flowers may or may not have cross-pollinated with.

  • Cross-pollination does not affect the appearance or flavour of fruits.
  • It does affect the genetic information inside seeds.

If you are growing different varieties of summer squash, they will probably cross-pollinate. This may not worry you when saving seed, if you feel adventurous and don’t mind next year’s fruits being of an unpredictable shape and colour.

To grow seeds of genetic purity that are true to the variety, you need to hand pollinate, before any insect pollinates the female flower.

  1. Place a paper bag, with a rubber band around its opening, over any female flower you may want to pollinate. The rubber band goes around the baby fruit, the flower is in the bag.
  2. Do this before the flower opens.
  3. Then do your pollination with a male flower against the female, once you see it open (you need to remove bag daily to check).
  4. Now put the paper bag back until the flower has died.

See Real Seeds for more information.

Potential problems

Which pests are likely, and when

Slugs like eating young plants, but mainly when they are weak from being transplanted too early.

  • If your garden is prone to slugs, I would sow later in spring, in May rather than April.

Interestingly, I have no other pests to report! In parts of the USA I hear about squash borers. I’m afraid I cannot advise on them, but I suspect that plants need a mesh cover – not practical for the regular picking however!

Other likely difficulties

Powdery mildew

From July or midsummer, you will notice white powdery mildew on the lower leaves. This is not as worrying as it appears and normally does not prevent new growth. You can cut off the mildewed leaves, wearing gloves, and plants will look nicer without necessarily growing better.

  • In my experience, the mildew is a natural dieback of older leaves that are not needed by the plants any more. Not everyone agrees with this.
Courgettes in late July, before removing leaves with mildew on
That same day, 30th July – we have deleafed the courgette plants, and this one was less stable for a while because it was reclining on older leaves
Still on the same day – this is how the whole bed looked after removing half of the leaves

Pollination

Pollination may not occur if you are in a district with few insects, maybe as a result of aerial mosquito sprays, or farmers killing insects in nearby fields. The sign of this will be fruits simply not developing and dropping off when tiny. This does not apply to those very first tiny fruits which I mentioned above.

If fruits are not developing, your best option is hand pollination – see ‘Saving seed’ above.

25th June, before the mildew arrives – I have no worries about the natural grey flecks on the leaves of this Defender F1 courgette, which has been cropping for a week
12th July – this beautiful courgette flower is on a plant that is starting to suffer from mildew
It’s not just us enjoying the flowers – this bee is having a great time in a female bloom
In my hand is a courgette with its female flower; all fruits have the dying petals of female flowers as they grow
There is a small male flower on the left, which is about in the middle, heightwise; generally, male flowers are not significant

And finally

Clear

Towards the end of summer, you will probably find that it is less appealing to eat courgettes and squash every day than it was in early summer! They have a justified reputation for overwhelming us with their abundance.

Despite this, I used to be attached to my plants until they were killed by frost. I had the feeling that they represented summer lingering, ahead of colder and darker days.

  • Frost does at least make clearing easy, because it converts a large plant into a few fibres – it’s quite a remarkable transformation.

Over succeeding years I have come to appreciate that there are more interesting possibilities for plantings in early autumn, after removing courgette plants at the end of summer. The choice is yours, and it is a nice option to have.

I suggest using a long-handled sharp spade to cut through the main stem at ground level, leaving all roots in the ground. Carry the plant to your compost heap and squash it down, always being careful not to let the spines rub your skin. Now simply rake the ground level – probably also necessary to water it thoroughly – and set out your new transplants.

By 30th August, these courgettes are now ready to clear. They are still cropping but are overpowering other nearby vegetables, and we have plenty of other harvests
Six days later, the courgette plants have been cleared from the bed to the right, which is now planted with small endive and mustard transplants

Follow with

There are several vegetables that can be transplanted through early autumn (much better than sowing direct), such as endives, salad rocket and Oriental leaves. By mid-autumn, the best options change, to transplants for overwintering as small plants. Examples are salad onions, lettuce and spring cabbage.