Beans – French and Runner

French bean – Phaseolus vulgaris; Runner bean – Phaseolus coccineus; Soy bean – Glycine max

All are legumes, in the plant family Fabaceae. Mostly they are grown for pods.

Beans – French and Runner

Introduction

Summer beans are a big subject! We also look at borlotti beans (Phaseolus v, Cranberry Group), a variety of common bean first bred in Colombia as the cargamanto, and sometimes called ‘cranberry bean’.

Another variation is the Lima bean (Phaseolus lunatus), also called butter and Madagascar bean. These beans are slightly larger than runners and super tasty, but they need a little more warmth than the other beans here.

All are legumes, in the plant family Fabaceae. Mostly they are grown for pods, through summer and into early autumn.

Some plants are dwarf and some climb, with bean pods of varied colour, shape and length. Many are suitable for ripening to dry, and we can then shell the seeds to eat as nutritious food in winter and beyond.

15th October – drying pods in the greenhouse; borlotti at the back, dry Czar in front, and more recently picked plants also at the back
As the spring cabbage is finishing in May, I am ready to transplant French beans from the modules
After shelling the borlotti beans and Czar runner beans, they finish their drying process on a sunny windowsill in October

Harvest period

  • Days from seed to first harvest: 55–70
  • Best climate is temperate to warm and not too dry, especially for climbing beans.

They are all sensitive to frost so the harvest period is midsummer to early autumn, around three months. During this time you can easily have a surplus of pods.

Harvests of mature pods for dry beans happen through the autumn, and in wet autumns they may not be totally dry.

All harvests need to finish before the first frost.

Why grow them

Flavour is a big motivation for growing your own, plus the regularity and abundance of harvests over a long period. Bean pods gathered and eaten on the same day have a crunchy texture, while yellow pods are slightly waxy.

Soy beans are delicious harvested in a green pod, with soft yellow beans inside, of superb flavour. Their harvest period is late summer, and the harvest is called edamame. Soy beans’ Latin name was chosen by Linnaeus, from the Greek ‘glykys’ which means sweet.

  • Shelled beans taste amazing too, for starters when you pick them to eat as fresh beans in early autumn. They are creamy and full of flavour, without any dressing or sauce. Especially the white Phaseolus, Czar.

Then, as long as they are fully dry before you put them in a jar, they store for many months, and have considerably more flavour than bought beans.

Suitable for containers?

The best type for containers is any dwarf French bean, just one per pot – pick carefully to keep it cropping over a long period.

There is a dwarf runner bean variety, Hestia, which sprawls a bit but does work for containers. Give it a little support, say 60 cm/2 ft sticks, otherwise beans at ground level may be eaten by slugs.

Conditions for success

As much as they need warmth to grow well, they also need sufficient moisture. When I lived in France, and we had a warm October when I could give plenty of water to the bean plants, they were some of the best of the year. They don’t like fierce heat, just warmth.

  • Grow under cover for early harvests, for example with a transplant of dwarf French beans, three to four weeks before your normal outside transplant date. Ensure to remove these plants by midsummer, when it may be too hot for successful growth and at risk from red spider mite.
21st April – a new planting of French beans, with some six-month-old garlic
21st May – a new planting of Cobra beans on strings
By 6th June there’s significant growth; see freshly transplanted cucumber and basil that have replaced the salad plants

High temperatures are detrimental to runner beans, which do not set well in hot summer weather, such as above 30 °C/86 °F by day. Night temperatures not going below about 18 °C/ 64°F also result in flowers not setting.

Not setting means that flowers appear and then simply drop off before becoming beans. It’s sometimes claimed that this is from a lack of moisture in the air or a lack of insects, but it’s from too much heat, together with too little moisture at the roots.

Climbing beans also do not like too much wind, as you can see from the photo below, taken during a windy summer.

30th July – climbing beans looking a little worse for wear after some serious wind in July; the wind came from the right, which is southwest, our prevailing wind
Mid-August, with soy beans closest to camera and teepees plus rows of climbing beans at the back; the teepees resisted winds better than the rows – see below

Varieties

There are green, yellow, and purple pods to choose from. Some are flat and some round. Some have white seeds and others are coloured – check out suppliers of heritage varieties such as Real Seeds in the UK. I give just a few examples here.

French beans – dwarf

They are easy to grow, not least because you don’t need to give any support. However, they grow heavy with pods and risk falling over, sometimes with the main stem snapping at ground level in a sudden high wind. This is terminal and very frustrating!

Dwarf bean plants crop earlier than climbing ones but finish earlier too.

  • I enjoy success with Cupidon and Safari (green pods), Orinoco and Sonesta (yellow pods), Purple Queen and Purple Teepee (purple pods).  Yellow pods keep their colour in cooking and purple ones lose it. There are many other varieties to try.
Orinoco – yellow dwarf beans; seed saved for three years now
Purple Queen – a dwarf French bean
Safari – with beans thinner than Cupidon

French beans – climbing

Your investment in a support structure is repaid by not needing to bend so much when harvesting. Plants also crop for a longer period than dwarf varieties, so one sowing, of Cobra for example, can feed you for two months or more.

A good strategy is to start the year with a few dwarf beans, then follow with a slightly later sowing of climbing beans. Sow the dwarf beans in mid-April under cover, and the climbing beans in late May, either under cover or outside.

  • Try Cobra for green pods, Neckargold and Golden Gate for yellow pods, and Cosse Violette for purple pods.
  • Standard borlotti beans grow a lovely harvest, either for pods or dry beans; there are also dwarf varieties.
12th August – climbing French bean Cobra at Lower Farm; the garden was quite sheltered which helped, and these have cropped for a month already
Golden Gate climbing beans – producing huge harvests by late July
In the polytunnel with cucumber, basil and Cobra beans cropping well – at this stage I stopped picking two plants to allow some pods to dry for seed

Runner or pole beans

These crop heavily and for a long period. In my part of England, they are a staple of many gardens from just one sowing, for bean pods all summer.

They can also be grown for dry seed, and the variety I recommend highly here (Czar) is white flowering and white seeded. Once you find some seeds and succeed a harvest, you will appreciate why I recommend them: for the amazing flavour. Summer and autumn need to be warm enough to enable both growing and maturing to dry.

  • Scarlet Emperor and Enorma grow large green pods over many weeks.
  • For dry beans, Czar grows lovely white ones, and also works for picking green pods.
  • I hear from several gardeners that their harvests are now less good from certain varieties of runner beans which they have grown for many years, while they keep buying new seed from the same seed company. See below for my tips on saving your own seed, which is less easy for runners than French beans.
The Czar runner bean has been left unpicked, as the seeds will be dried
An abundance of Borlotti beans; however, they are still unripe in late August, after a cool summer

Soy beans

Grow these as for dwarf French beans – they need warmth and are killed by frost. Harvests in my temperate climate are small but feel worthwhile, thanks to the excellent flavour.

In a warm summer, the pods can dry enough for shelling beans – see below.

I have limited experience of varieties – in the UK, Green Shell is common and grows well. Siverka is bred for cooler conditions and produced less well for me.

Sow and propagate

There are two factors to consider: plants are killed by frost and also need sustained warmth, both to germinate and grow strongly. They need to grow fast.

  • In spring, later sowings often succeed better because they grow smoothly and strongly, overtaking early sowings.

If you have the facilities, I recommend sowing under cover, even in summer, because it’s so much more reliable. Bean seedlings sown direct take up a fair amount of space, so it’s very worthwhile to sow them in just one module tray. This can provide enough transplants for a big area.

Also, you can pop seedling plants in between existing vegetables that are going to finish soon. We do this with overwintered lettuce for example. Garlic is another possibility.

17th June – a new transplanting of dwarf French beans, sown in modules 15 days earlier
27th June – the French beans are growing well; we kept a mesh cover over for the first three weeks, to protect from rabbits and wind
11th July – the same Cupidon French beans are thriving, and are now without a cover

Sowing conditions

The overriding need is for warmth: 20 °C/68 °F is a benchmark for healthy germination and early growth. Here in Somerset, for example, that does not happen outside until early or even mid-June.

Sowing time

Therefore sow outside in early June, or under cover around the middle of May/late spring.

Sowing method

Bean seeds are quite large, so under cover sowings need a 4 cm/1.5 in diameter cell. Cover with as much compost as seeds are wide, not long, and it’s fine to place the seeds on their sides rather than pointed up or down. Any way works.

  • When I am confident of strong germination, I sow one seed per cell. Sometimes this is not the case and I sow two seeds per cell, then thin to the strongest if they both start growing well.

For outdoor sowings, an easy method is to make holes with a wooden dibber, then simply drop beans seeds into a depth of no more than 2.5 cm/1 in below the surface. You can then use the dibber to scuff the surface and fill in your holes.

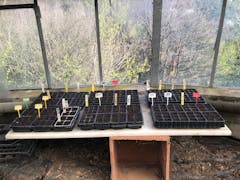
Sowing French beans in module trays at one or two seeds per cell, thinned to one when transplanted after three to four weeks
Cupidon French dwarf bean on the left, and Cobra climbing bean on the right – 20 plants of each

Pot on?

There should be no need to pot on seedlings from module into pot unless, for whatever reason, the bed is not yet ready for your plants. Or perhaps you sowed too early and it’s still cool outside!

I advise getting seedlings out as soon as possible before they need potting on, for more rapid and successful growth. The photos below show how I popped in bean plants between or close to existing vegetables which were soon to be harvested and cleared.

16th June – spinach with freshly interplanted French beans
30th May – a new planting of dwarf French beans, between fennel plants which I harvested throughout June
Three months since planting, the fennel is almost gone and the bean plants are growing quickly

Transplant

Transplant size

Small is good. For dwarf beans, 5–7 cm/2–3 in high; for climbing beans, 10–15 cm/4–6 in is fine.

Transplant time

For early plantings, it’s all about warmth, and they cannot be made before the last frost date. A week or two after that date is better. This means the soil will have warmed, making growth more certain, and it’s also less likely that slugs will eat plant leaves. If bean plants are cold, they are weak, which invites pests.

Mid-May – a new planting of soy beans, with fleece on hoops for protection against frost and wind
Five-week-old French beans, which were transplanted one week earlier in early June; French marigold in front
The same plants now thriving in early July, with an interplant of multisown leeks which established well between the bean plants, if slower than usual!

Spacing

Dwarf beans can be spaced as little as 30 cm/12in apart, or up to 37 cm/15 in for easier picking and a slightly longer cropping period.

You can grow climbing beans either in rows, or in circles called teepees. Best spacing between plants is 30 cm/12 in, whichever support method you use.

  • A teepee can be any diameter between 90 and 135 cm/3ft and 4.5ft.  
  • If you are making rows, each one should be around 60–90 cm/2–3 feet apart. This allows just enough space to walk between each line of two rows, which grow up to a central line along the top, as in the photos below.
25th April – Small Garden with new planting of soy beans in the middle bed, just beyond the pea plants; this was a speculative early planting which survived -2 °C/28°F frost under double thickness of fleece
See the spacings for lines across the bed and three teepees, and the use of miscanthus mulch when planting Borlotti and runner beans in late May
The same beans in late July – now 77 days old and transplanted 65 days earlier; to give a sense of size, the bed is 2m/6.5ft wide

Support

Use whatever sticks you can find, and sharpen the bottoms so that they slide into the soil more easily. Bamboo canes are slightly thinner and do not need sharpening, but always put the fat end in the ground. For rows, not teepees, you need a few other sticks to serve as horizontals at head height, and they can be less stout.

The verticals sticks are best 2.5– 4 cm/1–1.5 in diameter (roughly) and 2.5 m/8.2 ft long. You may need to use a crowbar, or equivalent, to open soil enough that wooden sticks push in a good 20 cm/8 in deep.

Support for climbing beans must be strong, and stable enough that they stand firm during high winds in summer. Around here the traditional shape of supports is a line of two rows, with sticks pointing towards the middle and making a V at head height. Another stick is placed in the V horizontally, and tied firmly where it meets the two side canes – see the photos below.

However, in windy places, this creates a barrier to wind and is more inclined to blow over. Teepees are more stable because wind can flow around them. You walk around teepees to find beans and discover that there are more hiding in the middle, in comparison to plants in lines.

1. 29th May –  runner and Borlotti beans have just been planted, whilst lettuce is still finishing, a whole seven and a half months since it was planted

2. The same beans after a gale on 21st of August, not looking too lively; initially I didn’t have much hope for them, but their stems were more flexible than I knew!

3. The same beans on 26th August, after having been propped up with string and canes, using the compost bay structure for extra support
4. The nearest three teepees of beans are much less damaged than the lines beyond – see the leaning at the far end of the row

Water

How often

The main time to give water is when flowering commences, and then water maybe twice a week, or every two days if it’s very dry.

For harvests of dry beans, do not water after you have seen a full set of bean pods and some swelling, usually by early autumn.

13th July – these Czar runner beans and Zinnia need a good watering, after ten days without rain
24th September – a drone view shows climbing beans, for harvest of dry pods, in the right-hand bed, and also far left just behind the compost bay, with yellowing leaves as the plants start to dry

How much

Climbing beans, with their many leaves, need more water than dwarf beans. Nonetheless, they all need a good soak whenever you water because they grow so fast, and will reward you with more beans in exchange.

Extra mulch to retain moisture?

A compost mulch is sufficient in temperate climates. Here I have experimented with undecomposed materials on top, and have not noticed a huge improvement. However, I would mulch if the climate was hotter and drier in summer. The miscanthus I spread on top of the compost above, around new plantings, made little difference.

Prune & thin

You don’t need to do any thinning or pruning, with one exception. In late summer it can be worth pinching off any new shoots, stems and flowers, on plants that are for dry beans. This is because new bean pods forming in early autumn will not have time to fill their pods and mature the beans.

Harvest times and methods

Once dwarf bean plants start cropping in early to midsummer, they can give huge amounts of beans very suddenly, in a flush for about two weeks. Then growth of new pods slows for another four weeks or so. Beyond that, there are still harvests, but of decreasing quantity and quality. Pods grow less straight and may have a stringy texture, with small seeds inside.

  • Climbing beans crop over a longer period and give huge harvests in warm weather.
  • Timings and methods for harvesting dry beans are different to those for fresh.
7th September – climbing beans in full flow; you can see most pods are swelling with seeds and I have not picked any for green pods
21st September – a first pick of Czar runner bean pods; these are the beans after being freshly podded
By 25th October there will soon be a frost, so we picked this final harvest of Czar beans, still fresh and moist; these are delicious after only a 20-minute boil because they are still tender

How to judge readiness

Pods are most tender at any stage before you see beans swelling inside them. However, if you continually pick French beans very small, which are called filet beans, you have a smaller harvest in proportion to the time you spend picking. Filet beans grow to full-size pods in just a few days.

For dry beans, the pods need to be yellow and preferably dry. However, if the weather is cool and damp, it can be better to pick beans when yellow and before they rot on the plants, then dry them under cover.

2nd October – I’m selecting the driest bean pods to pick
For the first stage of shelling Borlotti beans, I walk on the dry pods, on a bedsheet over concrete

How to pick

The stalk of bean pods is woody and strong, so, when picking pods, be careful not to disturb plant roots or break off whole stems. You can use two hands, with one holding the plant stem, and the other detaching your harvest.

When to pick and how often

In hot weather, the pods mature very fast, from being tender to rather tough, and with some stringiness.

  • For fresh pods, pick every two to three days, and search under leaves for hidden ones.
  • For dry beans, the first harvest will be late summer; for runner beans pick every week through early autumn. A final harvest before frost will include some green pods, with beans which are delicious to eat at the time, rather than trying to dry them.
  • Borlotti and French beans keep condition better than runners while drying. You can leave them all unpicked until most leaves are falling off and you can see a large number of dry pods. Then, while picking them all, separate out the few which are still soft, for eating immediately, and dry the rest in their pods.
1st August – ten weeks since transplanting this second sowing of French beans, and I’ve had two large picks out of the plants already, Zinnias at the front
9th August – the final picking of these French beans from the planting in late May; now preparing to clear the bed
The second planting of ‘Cupidon’ French beans, in a bed previously occupied by cauliflower. This is 68 days since they were sown, and we’re now on the third pick.

Final drying and shelling of dry beans

The pods you pick for dry beans are often not fully dry, in which case there is a final stage of drying before you put beans in jars to store.

  • For runner beans, we find it best to shell out the contents and lay them on trays on a sunny windowsill for a week or two.
  • Borlotti beans are easier when you leave them unshelled, but again, lay them on trays in a sunny, dry place. Then you can shell them once the pods are cracking dry. See the photographs above and below.

Soy bean harvest for dry beans

When soy beans are still soft in the pod, with the pods more yellow than brown, or even green but swollen, the harvest is truly delicious. Boil them in the pod for three minutes, drain off the water, and sprinkle a little salt before eating. (Place the cooked pods in your mouth, then pull them slowly out with front teeth together, to extract the beans. Pods are stringy at this stage.)

Then, even in a temperate climate, pods quickly pass from the edamame stage to being quite dry and with hard beans. It’s a fair amount of time needed to hand-pick pods and shell out the beans.

At least the dry beans are also very tasty, way more so than soy beans you buy. They are also larger and slightly yellow. Plus you can keep them for seed because they do not cross-pollinate, from what I observe.

Soy plants in late August – the edamame harvest is now finished, and soon we shall harvest pods for dry beans
Early October – fully dry pods grown from seed I was given called Linnaeus, for its genetic purity I believe!
Soy beans now completely dry – two varieties of Linnaeus on the left, and Green Shell on the right; I store them in glass jars

Saving seed

The process of saving bean seed is the same as for harvests of dried beans, explained above.

  • A joy of saving seed for French beans is that they do not cross-pollinate between different varieties, nor do they need more than one plant for there to be viable seed. Therefore put a cane next to any plant you want to keep seed from, to remind you not to pick any of its beans. The result is a worthwhile seed harvest that has time to mature by early autumn because you did not pick any beans in the previous weeks.
  • Runner beans do cross-pollinate, and if you grow more than one variety your seeds will not grow true. Best find a favourite and keep growing that one, because homesaved seed which is fresh germinates so much better than bought seed. Also, the plants will be better adapted to your climate and conditions.
  • I find that borlotti beans do not cross-pollinate, but I am not certain that this is always the case. For example, whether dwarf Borlottis might cross with climbing ones, to produce an interesting result!

Two Cupidon plants unpicked and grown for seed – this is August; they were grown in the polytunnel
Late August – Orinoco yellow French bean outside, not picked; it will give a lot of seed

Potential problems

Which pests are likely, and when

These plants suffer few pests, except for slugs possibly eating new plantings, and blackflies sucking sap from the stems. In both cases, the remedy is to grow stronger plants.

  • Do not use undecomposed mulches around new plantings if you are in a damp climate, and wait for sufficient warmth before transplanting.
  • As soon as you see blackflies, spray the affected stems with water and water the roots as well. They should then diminish quite quickly.

Protections needed

New plantings in spring may benefit from a fleece or mesh cover, for protection from cold winds.

Once sticks are in place it’s difficult to cover plants. I am nervous if I see rabbits chewing the main stems of climbing beans, yet they regrow, without protection. Possibly because rabbits are not too numerous here, but it’s one to be aware of, and bird netting could help.

30th May – mesh placed over French bean transplants, to protect them from wind
French climbing beans covered with Thermacrop as frost protection; the air temperature here is 0.7°C/33°F
Rabbit damage to bean plants in early summer, although they bounced back and grew well

Other likely difficulties

Diseases are few, and the most likely problem is from beans not setting in extreme heat – see ‘Conditions for success’ above.

The dreaded pyralid weedkiller is highly damaging to bean plants. The photos below are to help you identify this potential problem. It can be in peat-free potting composts, made from garden wastes which were composted with lawn clippings from sprayed lawns. Yes, people do such crazy things, and the danger is invisible to us until our plants suffer.

French beans and chard lettuce in modules – on the right you see normal compost, on the left the impact of compost affected by pryalid
Godney Farm in Somerset were unlucky to lose a whole planting of tomatoes and French beans to aminopyralid in cow manure; one healthy plant in a pot serves to demonstrate the poison’s effect

And finally

Clear

Use a sharp knife or trowel to cut stems at ground level or just below, leaving most roots in the ground. There won’t be many nitrogen nodules by this stage because bean plants use most of them to grow themselves.

When we grow these plants for bean harvests, they are close to the end of their lives by the time we remove them. At this stage, they make no new nodules.

When clearing plants in autumn, rather than during the summer, I like to spread the annual dose of compost before any transplants. Soil is fed and protected through winter, and you don’t then need to spread new compost in spring, before new plantings.

Follow with

Early plantings of dwarf beans finish by late summer, allowing time to grow brassicas for autumn and spring harvests, as well as salads, herbs and fennel. Soy beans may also finish by early autumn – then transplant brassica salads or spring cabbage.

Climbing beans need a whole summer to grow. Remove plants as soon as you have the final harvest, then transplant salads for harvest through winter and spring.

Another option, that goes against most rotation theory, is to transplant broad beans in late autumn. Or sow mustard as a cover crop/green manure.

After dwarf beans finished, we transplanted Pak Choi in this bed on 9th September; now, on 18th October, you can also see multisown spring onions on the right and broccoli for spring on the left
13th December – two months after salad plants were transplanted on 13th October, following removal of climbing beans
13th December – two weeks after transplanting broad beans into a bed previously inhabited by climbing beans throughout the summer

Beans – French and Runner

French bean – Phaseolus vulgaris; Runner bean – Phaseolus coccineus; Soy bean – Glycine max

All are legumes, in the plant family Fabaceae. Mostly they are grown for pods.

Beans – French and Runner

Introduction

Summer beans are a big subject! We also look at borlotti beans (Phaseolus v, Cranberry Group), a variety of common bean first bred in Colombia as the cargamanto, and sometimes called ‘cranberry bean’.

Another variation is the Lima bean (Phaseolus lunatus), also called butter and Madagascar bean. These beans are slightly larger than runners and super tasty, but they need a little more warmth than the other beans here.

All are legumes, in the plant family Fabaceae. Mostly they are grown for pods, through summer and into early autumn.

Some plants are dwarf and some climb, with bean pods of varied colour, shape and length. Many are suitable for ripening to dry, and we can then shell the seeds to eat as nutritious food in winter and beyond.

15th October – drying pods in the greenhouse; borlotti at the back, dry Czar in front, and more recently picked plants also at the back
As the spring cabbage is finishing in May, I am ready to transplant French beans from the modules
After shelling the borlotti beans and Czar runner beans, they finish their drying process on a sunny windowsill in October

Harvest period

  • Days from seed to first harvest: 55–70
  • Best climate is temperate to warm and not too dry, especially for climbing beans.

They are all sensitive to frost so the harvest period is midsummer to early autumn, around three months. During this time you can easily have a surplus of pods.

Harvests of mature pods for dry beans happen through the autumn, and in wet autumns they may not be totally dry.

All harvests need to finish before the first frost.

Why grow them

Flavour is a big motivation for growing your own, plus the regularity and abundance of harvests over a long period. Bean pods gathered and eaten on the same day have a crunchy texture, while yellow pods are slightly waxy.

Soy beans are delicious harvested in a green pod, with soft yellow beans inside, of superb flavour. Their harvest period is late summer, and the harvest is called edamame. Soy beans’ Latin name was chosen by Linnaeus, from the Greek ‘glykys’ which means sweet.

  • Shelled beans taste amazing too, for starters when you pick them to eat as fresh beans in early autumn. They are creamy and full of flavour, without any dressing or sauce. Especially the white Phaseolus, Czar.

Then, as long as they are fully dry before you put them in a jar, they store for many months, and have considerably more flavour than bought beans.

Suitable for containers?

The best type for containers is any dwarf French bean, just one per pot – pick carefully to keep it cropping over a long period.

There is a dwarf runner bean variety, Hestia, which sprawls a bit but does work for containers. Give it a little support, say 60 cm/2 ft sticks, otherwise beans at ground level may be eaten by slugs.

Conditions for success

As much as they need warmth to grow well, they also need sufficient moisture. When I lived in France, and we had a warm October when I could give plenty of water to the bean plants, they were some of the best of the year. They don’t like fierce heat, just warmth.

  • Grow under cover for early harvests, for example with a transplant of dwarf French beans, three to four weeks before your normal outside transplant date. Ensure to remove these plants by midsummer, when it may be too hot for successful growth and at risk from red spider mite.
21st April – a new planting of French beans, with some six-month-old garlic
21st May – a new planting of Cobra beans on strings
By 6th June there’s significant growth; see freshly transplanted cucumber and basil that have replaced the salad plants

High temperatures are detrimental to runner beans, which do not set well in hot summer weather, such as above 30 °C/86 °F by day. Night temperatures not going below about 18 °C/ 64°F also result in flowers not setting.

Not setting means that flowers appear and then simply drop off before becoming beans. It’s sometimes claimed that this is from a lack of moisture in the air or a lack of insects, but it’s from too much heat, together with too little moisture at the roots.

Climbing beans also do not like too much wind, as you can see from the photo below, taken during a windy summer.

30th July – climbing beans looking a little worse for wear after some serious wind in July; the wind came from the right, which is southwest, our prevailing wind
Mid-August, with soy beans closest to camera and teepees plus rows of climbing beans at the back; the teepees resisted winds better than the rows – see below

Varieties

There are green, yellow, and purple pods to choose from. Some are flat and some round. Some have white seeds and others are coloured – check out suppliers of heritage varieties such as Real Seeds in the UK. I give just a few examples here.

French beans – dwarf

They are easy to grow, not least because you don’t need to give any support. However, they grow heavy with pods and risk falling over, sometimes with the main stem snapping at ground level in a sudden high wind. This is terminal and very frustrating!

Dwarf bean plants crop earlier than climbing ones but finish earlier too.

  • I enjoy success with Cupidon and Safari (green pods), Orinoco and Sonesta (yellow pods), Purple Queen and Purple Teepee (purple pods).  Yellow pods keep their colour in cooking and purple ones lose it. There are many other varieties to try.
Orinoco – yellow dwarf beans; seed saved for three years now
Purple Queen – a dwarf French bean
Safari – with beans thinner than Cupidon

French beans – climbing

Your investment in a support structure is repaid by not needing to bend so much when harvesting. Plants also crop for a longer period than dwarf varieties, so one sowing, of Cobra for example, can feed you for two months or more.

A good strategy is to start the year with a few dwarf beans, then follow with a slightly later sowing of climbing beans. Sow the dwarf beans in mid-April under cover, and the climbing beans in late May, either under cover or outside.

  • Try Cobra for green pods, Neckargold and Golden Gate for yellow pods, and Cosse Violette for purple pods.
  • Standard borlotti beans grow a lovely harvest, either for pods or dry beans; there are also dwarf varieties.
12th August – climbing French bean Cobra at Lower Farm; the garden was quite sheltered which helped, and these have cropped for a month already
Golden Gate climbing beans – producing huge harvests by late July
In the polytunnel with cucumber, basil and Cobra beans cropping well – at this stage I stopped picking two plants to allow some pods to dry for seed

Runner or pole beans

These crop heavily and for a long period. In my part of England, they are a staple of many gardens from just one sowing, for bean pods all summer.

They can also be grown for dry seed, and the variety I recommend highly here (Czar) is white flowering and white seeded. Once you find some seeds and succeed a harvest, you will appreciate why I recommend them: for the amazing flavour. Summer and autumn need to be warm enough to enable both growing and maturing to dry.

  • Scarlet Emperor and Enorma grow large green pods over many weeks.
  • For dry beans, Czar grows lovely white ones, and also works for picking green pods.
  • I hear from several gardeners that their harvests are now less good from certain varieties of runner beans which they have grown for many years, while they keep buying new seed from the same seed company. See below for my tips on saving your own seed, which is less easy for runners than French beans.
The Czar runner bean has been left unpicked, as the seeds will be dried
An abundance of Borlotti beans; however, they are still unripe in late August, after a cool summer

Soy beans

Grow these as for dwarf French beans – they need warmth and are killed by frost. Harvests in my temperate climate are small but feel worthwhile, thanks to the excellent flavour.

In a warm summer, the pods can dry enough for shelling beans – see below.

I have limited experience of varieties – in the UK, Green Shell is common and grows well. Siverka is bred for cooler conditions and produced less well for me.

Sow and propagate

There are two factors to consider: plants are killed by frost and also need sustained warmth, both to germinate and grow strongly. They need to grow fast.

  • In spring, later sowings often succeed better because they grow smoothly and strongly, overtaking early sowings.

If you have the facilities, I recommend sowing under cover, even in summer, because it’s so much more reliable. Bean seedlings sown direct take up a fair amount of space, so it’s very worthwhile to sow them in just one module tray. This can provide enough transplants for a big area.

Also, you can pop seedling plants in between existing vegetables that are going to finish soon. We do this with overwintered lettuce for example. Garlic is another possibility.

17th June – a new transplanting of dwarf French beans, sown in modules 15 days earlier
27th June – the French beans are growing well; we kept a mesh cover over for the first three weeks, to protect from rabbits and wind
11th July – the same Cupidon French beans are thriving, and are now without a cover

Sowing conditions

The overriding need is for warmth: 20 °C/68 °F is a benchmark for healthy germination and early growth. Here in Somerset, for example, that does not happen outside until early or even mid-June.

Sowing time

Therefore sow outside in early June, or under cover around the middle of May/late spring.

Sowing method

Bean seeds are quite large, so under cover sowings need a 4 cm/1.5 in diameter cell. Cover with as much compost as seeds are wide, not long, and it’s fine to place the seeds on their sides rather than pointed up or down. Any way works.

  • When I am confident of strong germination, I sow one seed per cell. Sometimes this is not the case and I sow two seeds per cell, then thin to the strongest if they both start growing well.

For outdoor sowings, an easy method is to make holes with a wooden dibber, then simply drop beans seeds into a depth of no more than 2.5 cm/1 in below the surface. You can then use the dibber to scuff the surface and fill in your holes.

Sowing French beans in module trays at one or two seeds per cell, thinned to one when transplanted after three to four weeks
Cupidon French dwarf bean on the left, and Cobra climbing bean on the right – 20 plants of each

Pot on?

There should be no need to pot on seedlings from module into pot unless, for whatever reason, the bed is not yet ready for your plants. Or perhaps you sowed too early and it’s still cool outside!

I advise getting seedlings out as soon as possible before they need potting on, for more rapid and successful growth. The photos below show how I popped in bean plants between or close to existing vegetables which were soon to be harvested and cleared.

16th June – spinach with freshly interplanted French beans
30th May – a new planting of dwarf French beans, between fennel plants which I harvested throughout June
Three months since planting, the fennel is almost gone and the bean plants are growing quickly

Transplant

Transplant size

Small is good. For dwarf beans, 5–7 cm/2–3 in high; for climbing beans, 10–15 cm/4–6 in is fine.

Transplant time

For early plantings, it’s all about warmth, and they cannot be made before the last frost date. A week or two after that date is better. This means the soil will have warmed, making growth more certain, and it’s also less likely that slugs will eat plant leaves. If bean plants are cold, they are weak, which invites pests.

Mid-May – a new planting of soy beans, with fleece on hoops for protection against frost and wind
Five-week-old French beans, which were transplanted one week earlier in early June; French marigold in front
The same plants now thriving in early July, with an interplant of multisown leeks which established well between the bean plants, if slower than usual!

Spacing

Dwarf beans can be spaced as little as 30 cm/12in apart, or up to 37 cm/15 in for easier picking and a slightly longer cropping period.

You can grow climbing beans either in rows, or in circles called teepees. Best spacing between plants is 30 cm/12 in, whichever support method you use.

  • A teepee can be any diameter between 90 and 135 cm/3ft and 4.5ft.  
  • If you are making rows, each one should be around 60–90 cm/2–3 feet apart. This allows just enough space to walk between each line of two rows, which grow up to a central line along the top, as in the photos below.
25th April – Small Garden with new planting of soy beans in the middle bed, just beyond the pea plants; this was a speculative early planting which survived -2 °C/28°F frost under double thickness of fleece
See the spacings for lines across the bed and three teepees, and the use of miscanthus mulch when planting Borlotti and runner beans in late May
The same beans in late July – now 77 days old and transplanted 65 days earlier; to give a sense of size, the bed is 2m/6.5ft wide

Support

Use whatever sticks you can find, and sharpen the bottoms so that they slide into the soil more easily. Bamboo canes are slightly thinner and do not need sharpening, but always put the fat end in the ground. For rows, not teepees, you need a few other sticks to serve as horizontals at head height, and they can be less stout.

The verticals sticks are best 2.5– 4 cm/1–1.5 in diameter (roughly) and 2.5 m/8.2 ft long. You may need to use a crowbar, or equivalent, to open soil enough that wooden sticks push in a good 20 cm/8 in deep.

Support for climbing beans must be strong, and stable enough that they stand firm during high winds in summer. Around here the traditional shape of supports is a line of two rows, with sticks pointing towards the middle and making a V at head height. Another stick is placed in the V horizontally, and tied firmly where it meets the two side canes – see the photos below.

However, in windy places, this creates a barrier to wind and is more inclined to blow over. Teepees are more stable because wind can flow around them. You walk around teepees to find beans and discover that there are more hiding in the middle, in comparison to plants in lines.

1. 29th May –  runner and Borlotti beans have just been planted, whilst lettuce is still finishing, a whole seven and a half months since it was planted

2. The same beans after a gale on 21st of August, not looking too lively; initially I didn’t have much hope for them, but their stems were more flexible than I knew!

3. The same beans on 26th August, after having been propped up with string and canes, using the compost bay structure for extra support
4. The nearest three teepees of beans are much less damaged than the lines beyond – see the leaning at the far end of the row

Transplant size

Small is good. For dwarf beans, 5–7 cm/2–3 in high; for climbing beans, 10–15 cm/4–6 in is fine.

Transplant time

For early plantings, it’s all about warmth, and they cannot be made before the last frost date. A week or two after that date is better. This means the soil will have warmed, making growth more certain, and it’s also less likely that slugs will eat plant leaves. If bean plants are cold, they are weak, which invites pests.

Mid-May – a new planting of soy beans, with fleece on hoops for protection against frost and wind
Five-week-old French beans, which were transplanted one week earlier in early June; French marigold in front
The same plants now thriving in early July, with an interplant of multisown leeks which established well between the bean plants, if slower than usual!

Spacing

Dwarf beans can be spaced as little as 30 cm/12in apart, or up to 37 cm/15 in for easier picking and a slightly longer cropping period.

You can grow climbing beans either in rows, or in circles called teepees. Best spacing between plants is 30 cm/12 in, whichever support method you use.

  • A teepee can be any diameter between 90 and 135 cm/3ft and 4.5ft.  
  • If you are making rows, each one should be around 60–90 cm/2–3 feet apart. This allows just enough space to walk between each line of two rows, which grow up to a central line along the top, as in the photos below.
25th April – Small Garden with new planting of soy beans in the middle bed, just beyond the pea plants; this was a speculative early planting which survived -2 °C/28°F frost under double thickness of fleece
See the spacings for lines across the bed and three teepees, and the use of miscanthus mulch when planting Borlotti and runner beans in late May
The same beans in late July – now 77 days old and transplanted 65 days earlier; to give a sense of size, the bed is 2m/6.5ft wide

Support

Use whatever sticks you can find, and sharpen the bottoms so that they slide into the soil more easily. Bamboo canes are slightly thinner and do not need sharpening, but always put the fat end in the ground. For rows, not teepees, you need a few other sticks to serve as horizontals at head height, and they can be less stout.

The verticals sticks are best 2.5– 4 cm/1–1.5 in diameter (roughly) and 2.5 m/8.2 ft long. You may need to use a crowbar, or equivalent, to open soil enough that wooden sticks push in a good 20 cm/8 in deep.

Support for climbing beans must be strong, and stable enough that they stand firm during high winds in summer. Around here the traditional shape of supports is a line of two rows, with sticks pointing towards the middle and making a V at head height. Another stick is placed in the V horizontally, and tied firmly where it meets the two side canes – see the photos below.

However, in windy places, this creates a barrier to wind and is more inclined to blow over. Teepees are more stable because wind can flow around them. You walk around teepees to find beans and discover that there are more hiding in the middle, in comparison to plants in lines.

1. 29th May –  runner and Borlotti beans have just been planted, whilst lettuce is still finishing, a whole seven and a half months since it was planted

2. The same beans after a gale on 21st of August, not looking too lively; initially I didn’t have much hope for them, but their stems were more flexible than I knew!

3. The same beans on 26th August, after having been propped up with string and canes, using the compost bay structure for extra support
4. The nearest three teepees of beans are much less damaged than the lines beyond – see the leaning at the far end of the row

Prune & thin

You don’t need to do any thinning or pruning, with one exception. In late summer it can be worth pinching off any new shoots, stems and flowers, on plants that are for dry beans. This is because new bean pods forming in early autumn will not have time to fill their pods and mature the beans.

Harvest times and methods

Once dwarf bean plants start cropping in early to midsummer, they can give huge amounts of beans very suddenly, in a flush for about two weeks. Then growth of new pods slows for another four weeks or so. Beyond that, there are still harvests, but of decreasing quantity and quality. Pods grow less straight and may have a stringy texture, with small seeds inside.

  • Climbing beans crop over a longer period and give huge harvests in warm weather.
  • Timings and methods for harvesting dry beans are different to those for fresh.
7th September – climbing beans in full flow; you can see most pods are swelling with seeds and I have not picked any for green pods
21st September – a first pick of Czar runner bean pods; these are the beans after being freshly podded
By 25th October there will soon be a frost, so we picked this final harvest of Czar beans, still fresh and moist; these are delicious after only a 20-minute boil because they are still tender

How to judge readiness

Pods are most tender at any stage before you see beans swelling inside them. However, if you continually pick French beans very small, which are called filet beans, you have a smaller harvest in proportion to the time you spend picking. Filet beans grow to full-size pods in just a few days.

For dry beans, the pods need to be yellow and preferably dry. However, if the weather is cool and damp, it can be better to pick beans when yellow and before they rot on the plants, then dry them under cover.

2nd October – I’m selecting the driest bean pods to pick
For the first stage of shelling Borlotti beans, I walk on the dry pods, on a bedsheet over concrete

How to pick

The stalk of bean pods is woody and strong, so, when picking pods, be careful not to disturb plant roots or break off whole stems. You can use two hands, with one holding the plant stem, and the other detaching your harvest.

When to pick and how often

In hot weather, the pods mature very fast, from being tender to rather tough, and with some stringiness.

  • For fresh pods, pick every two to three days, and search under leaves for hidden ones.
  • For dry beans, the first harvest will be late summer; for runner beans pick every week through early autumn. A final harvest before frost will include some green pods, with beans which are delicious to eat at the time, rather than trying to dry them.
  • Borlotti and French beans keep condition better than runners while drying. You can leave them all unpicked until most leaves are falling off and you can see a large number of dry pods. Then, while picking them all, separate out the few which are still soft, for eating immediately, and dry the rest in their pods.
1st August – ten weeks since transplanting this second sowing of French beans, and I’ve had two large picks out of the plants already, Zinnias at the front
9th August – the final picking of these French beans from the planting in late May; now preparing to clear the bed
The second planting of ‘Cupidon’ French beans, in a bed previously occupied by cauliflower. This is 68 days since they were sown, and we’re now on the third pick.

Final drying and shelling of dry beans

The pods you pick for dry beans are often not fully dry, in which case there is a final stage of drying before you put beans in jars to store.

  • For runner beans, we find it best to shell out the contents and lay them on trays on a sunny windowsill for a week or two.
  • Borlotti beans are easier when you leave them unshelled, but again, lay them on trays in a sunny, dry place. Then you can shell them once the pods are cracking dry. See the photographs above and below.

Soy bean harvest for dry beans

When soy beans are still soft in the pod, with the pods more yellow than brown, or even green but swollen, the harvest is truly delicious. Boil them in the pod for three minutes, drain off the water, and sprinkle a little salt before eating. (Place the cooked pods in your mouth, then pull them slowly out with front teeth together, to extract the beans. Pods are stringy at this stage.)

Then, even in a temperate climate, pods quickly pass from the edamame stage to being quite dry and with hard beans. It’s a fair amount of time needed to hand-pick pods and shell out the beans.

At least the dry beans are also very tasty, way more so than soy beans you buy. They are also larger and slightly yellow. Plus you can keep them for seed because they do not cross-pollinate, from what I observe.

Soy plants in late August – the edamame harvest is now finished, and soon we shall harvest pods for dry beans
Early October – fully dry pods grown from seed I was given called Linnaeus, for its genetic purity I believe!
Soy beans now completely dry – two varieties of Linnaeus on the left, and Green Shell on the right; I store them in glass jars

Saving seed

The process of saving bean seed is the same as for harvests of dried beans, explained above.

  • A joy of saving seed for French beans is that they do not cross-pollinate between different varieties, nor do they need more than one plant for there to be viable seed. Therefore put a cane next to any plant you want to keep seed from, to remind you not to pick any of its beans. The result is a worthwhile seed harvest that has time to mature by early autumn because you did not pick any beans in the previous weeks.
  • Runner beans do cross-pollinate, and if you grow more than one variety your seeds will not grow true. Best find a favourite and keep growing that one, because homesaved seed which is fresh germinates so much better than bought seed. Also, the plants will be better adapted to your climate and conditions.
  • I find that borlotti beans do not cross-pollinate, but I am not certain that this is always the case. For example, whether dwarf Borlottis might cross with climbing ones, to produce an interesting result!

Two Cupidon plants unpicked and grown for seed – this is August; they were grown in the polytunnel
Late August – Orinoco yellow French bean outside, not picked; it will give a lot of seed

Potential problems

Which pests are likely, and when

These plants suffer few pests, except for slugs possibly eating new plantings, and blackflies sucking sap from the stems. In both cases, the remedy is to grow stronger plants.

  • Do not use undecomposed mulches around new plantings if you are in a damp climate, and wait for sufficient warmth before transplanting.
  • As soon as you see blackflies, spray the affected stems with water and water the roots as well. They should then diminish quite quickly.

Protections needed

New plantings in spring may benefit from a fleece or mesh cover, for protection from cold winds.

Once sticks are in place it’s difficult to cover plants. I am nervous if I see rabbits chewing the main stems of climbing beans, yet they regrow, without protection. Possibly because rabbits are not too numerous here, but it’s one to be aware of, and bird netting could help.

30th May – mesh placed over French bean transplants, to protect them from wind
French climbing beans covered with Thermacrop as frost protection; the air temperature here is 0.7°C/33°F
Rabbit damage to bean plants in early summer, although they bounced back and grew well

Other likely difficulties

Diseases are few, and the most likely problem is from beans not setting in extreme heat – see ‘Conditions for success’ above.

The dreaded pyralid weedkiller is highly damaging to bean plants. The photos below are to help you identify this potential problem. It can be in peat-free potting composts, made from garden wastes which were composted with lawn clippings from sprayed lawns. Yes, people do such crazy things, and the danger is invisible to us until our plants suffer.

French beans and chard lettuce in modules – on the right you see normal compost, on the left the impact of compost affected by pryalid
Godney Farm in Somerset were unlucky to lose a whole planting of tomatoes and French beans to aminopyralid in cow manure; one healthy plant in a pot serves to demonstrate the poison’s effect

And finally

Clear

Use a sharp knife or trowel to cut stems at ground level or just below, leaving most roots in the ground. There won’t be many nitrogen nodules by this stage because bean plants use most of them to grow themselves.

When we grow these plants for bean harvests, they are close to the end of their lives by the time we remove them. At this stage, they make no new nodules.

When clearing plants in autumn, rather than during the summer, I like to spread the annual dose of compost before any transplants. Soil is fed and protected through winter, and you don’t then need to spread new compost in spring, before new plantings.

Follow with

Early plantings of dwarf beans finish by late summer, allowing time to grow brassicas for autumn and spring harvests, as well as salads, herbs and fennel. Soy beans may also finish by early autumn – then transplant brassica salads or spring cabbage.

Climbing beans need a whole summer to grow. Remove plants as soon as you have the final harvest, then transplant salads for harvest through winter and spring.

Another option, that goes against most rotation theory, is to transplant broad beans in late autumn. Or sow mustard as a cover crop/green manure.

After dwarf beans finished, we transplanted Pak Choi in this bed on 9th September; now, on 18th October, you can also see multisown spring onions on the right and broccoli for spring on the left
13th December – two months after salad plants were transplanted on 13th October, following removal of climbing beans
13th December – two weeks after transplanting broad beans into a bed previously inhabited by climbing beans throughout the summer
sow & propagate

There are two factors to consider: plants are killed by frost and also need sustained warmth, both to germinate and grow strongly. They need to grow fast.

  • In spring, later sowings often succeed better because they grow smoothly and strongly, overtaking early sowings.

If you have the facilities, I recommend sowing under cover, even in summer, because it’s so much more reliable. Bean seedlings sown direct take up a fair amount of space, so it’s very worthwhile to sow them in just one module tray. This can provide enough transplants for a big area.

Also, you can pop seedling plants in between existing vegetables that are going to finish soon. We do this with overwintered lettuce for example. Garlic is another possibility.

Sowing conditions

The overriding need is for warmth: 20 °C/68 °F is a benchmark for healthy germination and early growth. Here in Somerset, for example, that does not happen outside until early or even mid-June.

Sowing time

Therefore sow outside in early June, or under cover around the middle of May/late spring.

Sowing method

Bean seeds are quite large, so under cover sowings need a 4 cm/1.5 in diameter cell. Cover with as much compost as seeds are wide, not long, and it’s fine to place the seeds on their sides rather than pointed up or down. Any way works.

  • When I am confident of strong germination, I sow one seed per cell. Sometimes this is not the case and I sow two seeds per cell, then thin to the strongest if they both start growing well.

For outdoor sowings, an easy method is to make holes with a wooden dibber, then simply drop beans seeds into a depth of no more than 2.5 cm/1 in below the surface. You can then use the dibber to scuff the surface and fill in your holes.

Pot on?

There should be no need to pot on seedlings from module into pot unless, for whatever reason, the bed is not yet ready for your plants. Or perhaps you sowed too early and it’s still cool outside!

I advise getting seedlings out as soon as possible before they need potting on, for more rapid and successful growth. The photos below show how I popped in bean plants between or close to existing vegetables which were soon to be harvested and cleared.

No items found.
This is some text inside of a div block.
Transplant - Size, Time Of Year, Spacing, Support
This is some text inside of a div block.

Transplant size

Small is good. For dwarf beans, 5–7 cm/2–3 in high; for climbing beans, 10–15 cm/4–6 in is fine.

Transplant time

For early plantings, it’s all about warmth, and they cannot be made before the last frost date. A week or two after that date is better. This means the soil will have warmed, making growth more certain, and it’s also less likely that slugs will eat plant leaves. If bean plants are cold, they are weak, which invites pests.

Spacing

Dwarf beans can be spaced as little as 30 cm/12in apart, or up to 37 cm/15 in for easier picking and a slightly longer cropping period.

You can grow climbing beans either in rows, or in circles called teepees. Best spacing between plants is 30 cm/12 in, whichever support method you use.

  • A teepee can be any diameter between 90 and 135 cm/3ft and 4.5ft.  
  • If you are making rows, each one should be around 60–90 cm/2–3 feet apart. This allows just enough space to walk between each line of two rows, which grow up to a central line along the top, as in the photos below.

Support

Use whatever sticks you can find, and sharpen the bottoms so that they slide into the soil more easily. Bamboo canes are slightly thinner and do not need sharpening, but always put the fat end in the ground. For rows, not teepees, you need a few other sticks to serve as horizontals at head height, and they can be less stout.

The verticals sticks are best 2.5– 4 cm/1–1.5 in diameter (roughly) and 2.5 m/8.2 ft long. You may need to use a crowbar, or equivalent, to open soil enough that wooden sticks push in a good 20 cm/8 in deep.

Support for climbing beans must be strong, and stable enough that they stand firm during high winds in summer. Around here the traditional shape of supports is a line of two rows, with sticks pointing towards the middle and making a V at head height. Another stick is placed in the V horizontally, and tied firmly where it meets the two side canes – see the photos below.

However, in windy places, this creates a barrier to wind and is more inclined to blow over. Teepees are more stable because wind can flow around them. You walk around teepees to find beans and discover that there are more hiding in the middle, in comparison to plants in lines.

No items found.
Water

How often

The main time to give water is when flowering commences, and then water maybe twice a week, or every two days if it’s very dry.

For harvests of dry beans, do not water after you have seen a full set of bean pods and some swelling, usually by early autumn.

How much

Climbing beans, with their many leaves, need more water than dwarf beans. Nonetheless, they all need a good soak whenever you water because they grow so fast, and will reward you with more beans in exchange.

Extra mulch to retain moisture?

A compost mulch is sufficient in temperate climates. Here I have experimented with undecomposed materials on top, and have not noticed a huge improvement. However, I would mulch if the climate was hotter and drier in summer. The miscanthus I spread on top of the compost above, around new plantings, made little difference.

No items found.
No Images for this section
1
feed
No items found.
This is some text inside of a div block.
Container Growing
No items found.
This is some text inside of a div block.
Prune & Train Plants/Thin Fruit

You don’t need to do any thinning or pruning, with one exception. In late summer it can be worth pinching off any new shoots, stems and flowers, on plants that are for dry beans. This is because new bean pods forming in early autumn will not have time to fill their pods and mature the beans.

No items found.
This is some text inside of a div block.
Harvest Times & Method

Once dwarf bean plants start cropping in early to midsummer, they can give huge amounts of beans very suddenly, in a flush for about two weeks. Then growth of new pods slows for another four weeks or so. Beyond that, there are still harvests, but of decreasing quantity and quality. Pods grow less straight and may have a stringy texture, with small seeds inside.

  • Climbing beans crop over a longer period and give huge harvests in warm weather.
  • Timings and methods for harvesting dry beans are different to those for fresh.

How to judge readiness

Pods are most tender at any stage before you see beans swelling inside them. However, if you continually pick French beans very small, which are called filet beans, you have a smaller harvest in proportion to the time you spend picking. Filet beans grow to full-size pods in just a few days.

For dry beans, the pods need to be yellow and preferably dry. However, if the weather is cool and damp, it can be better to pick beans when yellow and before they rot on the plants, then dry them under cover.

How to pick

The stalk of bean pods is woody and strong, so, when picking pods, be careful not to disturb plant roots or break off whole stems. You can use two hands, with one holding the plant stem, and the other detaching your harvest.

When to pick and how often

In hot weather, the pods mature very fast, from being tender to rather tough, and with some stringiness.

  • For fresh pods, pick every two to three days, and search under leaves for hidden ones.
  • For dry beans, the first harvest will be late summer; for runner beans pick every week through early autumn. A final harvest before frost will include some green pods, with beans which are delicious to eat at the time, rather than trying to dry them.
  • Borlotti and French beans keep condition better than runners while drying. You can leave them all unpicked until most leaves are falling off and you can see a large number of dry pods. Then, while picking them all, separate out the few which are still soft, for eating immediately, and dry the rest in their pods.

Final drying and shelling of dry beans

The pods you pick for dry beans are often not fully dry, in which case there is a final stage of drying before you put beans in jars to store.

  • For runner beans, we find it best to shell out the contents and lay them on trays on a sunny windowsill for a week or two.
  • Borlotti beans are easier when you leave them unshelled, but again, lay them on trays in a sunny, dry place. Then you can shell them once the pods are cracking dry. See the photographs above and below.

Soy bean harvest for dry beans

When soy beans are still soft in the pod, with the pods more yellow than brown, or even green but swollen, the harvest is truly delicious. Boil them in the pod for three minutes, drain off the water, and sprinkle a little salt before eating. (Place the cooked pods in your mouth, then pull them slowly out with front teeth together, to extract the beans. Pods are stringy at this stage.)

Then, even in a temperate climate, pods quickly pass from the edamame stage to being quite dry and with hard beans. It’s a fair amount of time needed to hand-pick pods and shell out the beans.

At least the dry beans are also very tasty, way more so than soy beans you buy. They are also larger and slightly yellow. Plus you can keep them for seed because they do not cross-pollinate, from what I observe.

Saving seed

The process of saving bean seed is the same as for harvests of dried beans, explained above.

  • A joy of saving seed for French beans is that they do not cross-pollinate between different varieties, nor do they need more than one plant for there to be viable seed. Therefore put a cane next to any plant you want to keep seed from, to remind you not to pick any of its beans. The result is a worthwhile seed harvest that has time to mature by early autumn because you did not pick any beans in the previous weeks.
  • Runner beans do cross-pollinate, and if you grow more than one variety your seeds will not grow true. Best find a favourite and keep growing that one, because homesaved seed which is fresh germinates so much better than bought seed. Also, the plants will be better adapted to your climate and conditions.
  • I find that borlotti beans do not cross-pollinate, but I am not certain that this is always the case. For example, whether dwarf Borlottis might cross with climbing ones, to produce an interesting result!
No items found.
This is some text inside of a div block.
Potential Problems

Which pests are likely, and when

These plants suffer few pests, except for slugs possibly eating new plantings, and blackflies sucking sap from the stems. In both cases, the remedy is to grow stronger plants.

  • Do not use undecomposed mulches around new plantings if you are in a damp climate, and wait for sufficient warmth before transplanting.
  • As soon as you see blackflies, spray the affected stems with water and water the roots as well. They should then diminish quite quickly.

Protections needed

New plantings in spring may benefit from a fleece or mesh cover, for protection from cold winds.

Once sticks are in place it’s difficult to cover plants. I am nervous if I see rabbits chewing the main stems of climbing beans, yet they regrow, without protection. Possibly because rabbits are not too numerous here, but it’s one to be aware of, and bird netting could help.

Other likely difficulties

Diseases are few, and the most likely problem is from beans not setting in extreme heat – see ‘Conditions for success’ above.

The dreaded pyralid weedkiller is highly damaging to bean plants. The photos below are to help you identify this potential problem. It can be in peat-free potting composts, made from garden wastes which were composted with lawn clippings from sprayed lawns. Yes, people do such crazy things, and the danger is invisible to us until our plants suffer.

No items found.
This is some text inside of a div block.

Clear

Use a sharp knife or trowel to cut stems at ground level or just below, leaving most roots in the ground. There won’t be many nitrogen nodules by this stage because bean plants use most of them to grow themselves.

When we grow these plants for bean harvests, they are close to the end of their lives by the time we remove them. At this stage, they make no new nodules.

When clearing plants in autumn, rather than during the summer, I like to spread the annual dose of compost before any transplants. Soil is fed and protected through winter, and you don’t then need to spread new compost in spring, before new plantings.

Follow with

Early plantings of dwarf beans finish by late summer, allowing time to grow brassicas for autumn and spring harvests, as well as salads, herbs and fennel. Soy beans may also finish by early autumn – then transplant brassica salads or spring cabbage.

Climbing beans need a whole summer to grow. Remove plants as soon as you have the final harvest, then transplant salads for harvest through winter and spring.

Another option, that goes against most rotation theory, is to transplant broad beans in late autumn. Or sow mustard as a cover crop/green manure.

After dwarf beans finished, we transplanted Pak Choi in this bed on 9th September; now, on 18th October, you can also see multisown spring onions on the right and broccoli for spring on the left
13th December – two months after salad plants were transplanted on 13th October, following removal of climbing beans
13th December – two weeks after transplanting broad beans into a bed previously inhabited by climbing beans throughout the summer