Beans – Broad/Fava

Vicia faba

Their plant family is the Fabaceae, which includes all the beans and peas we eat as vegetables.

Beans – Broad/Fava

Introduction

Called Fava beans in North America. Here I refer to them as broad beans.

Their plant family is the Fabaceae, which includes all the beans and peas we eat as vegetables. In this same large family are lentils, peanuts, soy beans, acacia, mimosa and wisteria. All these plants can convert air nitrogen to nodules of nitrogen. You see these as pink clusters on the roots of plants when they are growing strongly.

4th June – broad bean pods are part of this wonderful early summer harvest which includes courgettes, cabbage, spring onion and asparagus
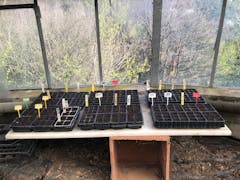
Sown in modules in November, then covered with a little compost; these will be ready to transplant in about four weeks when grown under cover
Nitrogen nodules accumulate on the roots of legumes such as peas and beans when plants are growing fast; much of this nitrogen is used by the legume plants themselves

Harvest period

Days from seed to harvest:
110 spring-sown, to 200 autumn-sown

In temperate climates it’s mid-May to early August, say late spring through to midsummer. It’s possible to harvest broad beans in late summer and even autumn, but the harvest at that time is light, compared to the time and space needed.

Later harvests mean plants have used the main part of a growing season, compared to early or pre-winter sowings. They are cleared in early to midsummer, which makes it easier to plant and sow again with another vegetable.

  • Broad beans, sown late October to early November, harvest late May through June.
  • Broad beans, sown February to April, harvest late June through to early August.
26th November – broad beans have just been planted after clearing cabbage
June – after clearing beans we transplant cabbage; by mid-October we have harvested most of the heads and the remaining ones are good to harvest for another month
2nd June – a great harvest of vegetables, with calabrese, cabbage, carrots, salad leaves, and broad beans from the November sowing
  • Best climate is temperate, not continental – moist is good.

Broad beans do not like it too hot. Their pattern of growth means harvests are best when day length is either increasing or still full.

In warm climates, such as Florida, they can crop in spring from sowing just before winter. In even hotter climates, I am unsure about timing, or of success.

In climates of winter frosts, they survive as small plants, at temperatures as low as -8—10 °C/ 8–14 °F. At those temperatures, and colder, some cover is worthwhile: mesh is better than fleece because it’s stronger. Snow protects them too.

22nd February – overwintered broad beans which were sown in early November

25th February – we see a frost on the bean plants of -2°C/28°F, cold enough to make the plants fall over because their stems are now elongating
26th March – broad beans and broccoli in a strong -3°C/27°F frost; they look bad here, but are standing again by midday
17th April – the same broad beans and broccoli, now in full health and growing well

Why grow them

Broad beans are mostly eaten shelled from their pods when green and fresh. They lose moisture and also sweetness with any lapse of time after picking.

Therefore freshly gathered homegrown broad beans have excellent flavour – if you have not eaten them before, do have a try. They are not too difficult to grow.

Unlike other vegetable beans, broad beans are frost hardy, and you can sow them in late autumn which means they crop early in the summer.

Therefore:

  • They are exciting! You enjoy early meals of vegetables with fruits of summer-like flavour, after the root vegetables of winter and leaf vegetables of spring.
  • There is time after clearing the old plants to grow a serious amount of vegetables in the same space. Examples include broccoli, cabbage, leeks, carrots and plenty more
31st May – beans Aquadulce Claudia from a November sowing; the first harvest is now ready with the lowest pods swelling
Mid-June – just two weeks later and Felix Hofmann is clearing bean debris from beds, before we transplant cabbages on the same day
Early July – broccoli plants are ready to transplant after broad beans have been cleared, with water in trenches in preparation

Suitable for containers?

Broad beans are large and hungry plants, with a high proportion of leaf and stem compared to the amount of food produced. This makes them probably not worthwhile to grow in containers, although you could try small varieties such as Robin Hood (see below) and The Sutton.

Conditions for success

Plants mature best before summer grows too hot and dry. They profit from a mild but long spring, when there is time for stems and leaves to develop fully before flowering initiates. This can be as early as May, before summer even begins.

When I lived in Southwest France, broad beans flowered in April and we harvested them in May. I followed them with beet transplants and grew giant fodder beet for the cows in that same year.

This is one of several reasons why autumn sowing is so successful: it ensures the long season of early growth before fruiting. During this time plants also tiller, which means growing several stems from one seed. They then look like multisown broad beans!

  • The take-home point is that broad beans are healthiest and most abundant in mild and moist weather, rather than hot.
13th December – trialing composts containing aminopyralids with broad bean plants; contaminated compost turns out to be in the left half of this tray
30th December – the compost trial continues; see two different varieties – taller Aquadulce Claudia on the left and Robin Hood on the right

Varieties

For sowing in autumn to overwinter, Aquadulce Claudia is perhaps the hardiest, is high yielding and develops great flavour if beans are allowed to mature until white and creamy. It also crops well from sowing by early spring.

Masterpiece Green Longpod has tasty green beans, and Green Windsor has a highly esteemed flavour.

Monica, or de Monica, and Robin Hood grow smaller plants, around 1.2 m/4 ft high, with pods of 4–5 pale-coloured, sweet beans.

Broad Bean Wizard, from Real Seeds, are great over winter, and produce a tasty crop in May, with many small pods.

For something different, there are crimson flowered varieties with pink seeds. The flowering period of all broad beans is a real addition to the garden, with a fine scent and attracting many insects.

Robin Hood broad beans with silky pods
11th June – a feast of spring vegetables! Early dehulled broad bean Aquadulce in the middle

Legumes for freezing – broad beans Karmazyn and Masterpiece Green Longpod, and Alderman peas alongside Sugar Snap

Video

How to grow broad beans

Sow and propagate

For germination, there is no special need for warmth, and for sowing in modules you do not need large pots or root-trainers, just a 4–5 cm/2 in cell cross-section, maybe 5 cm/2 in deep. There must be no rodents in the propagating space.

Homesaved broad bean seeds before soaking
The same broad bean seeds after soaking for 36 hours

Sowing time

From mid-October is possible but the first half of November is better, and again from February through March. Seeds germinate quite slowly and it can be two weeks after sowing before you notice a perky green shoot. Growth should then be steady but still not fast, because it’s usually at a cool time of year.

Also, plants start off very stocky, typical of any which grow in the winter. Compare their look to runner or pole beans (next lesson) whose stems are so long and thin, with large fluffy leaves full of water.

Sowing method

Either direct in the soil if no rodents likely, or in module trays for transplanting at four weeks old.

Pot on?

This should not be necessary, because seedlings grow better in the ground than in pots, after having been transplanted when small. Then they develop a strong and deep root structure early in life.

Peas and broad beans starting to emerge, one to two weeks after sowing in February; these spent their first ten days in the conservatory
This shows the importance of the sowing date in autumn – the broad beans on the left were sown eight days earlier; it also shows a compost trial with homemade one-year-old compost on the right, and Moorland Gold potting compost on the left
Living Green compost broad beans with roots that haven’t been air pruned – these were sitting on air holes for four weeks

Transplant

Propagation under cover is to enable seedlings to pass through the critical phases of germination and growing into small plants, without being eaten. After that, there is no benefit to continuing with growing them under cover. They grow roots in cool conditions and are better in the ground.

Transplant size

Seedlings can be anything from 5–10 cm/2–4 in tall, usually with just one stem from the one seed, at that stage.

  • There is no special soil preparation. This long bed had cropped lettuce through spring and early summer, then we grew chicories for heads of radicchio.
  • We cut the last heads in early November and, after twisting out all of their roots to leave most roots in the bed, we spread 3 cm/about 1 in of homemade compost.
13th December, with day temperatures of 7°C/45°F and sometimes -4°C/25°F at nights; these four to five-week-old bean seedlings have just been transplanted
December – keeping four to five-week-old broad bean seedlings under Thermacrop mesh; the main benefit at this stage is protection from wind

Transplant time

Weather is not a factor as long as the ground is not frozen. You can transplant any time from late autumn to early spring. Unless your summers are cool and damp, transplants in late spring and summer grow less abundantly, probably with more aphid problems too.

20th December – five-week-old broad beans planted deep and with a cloche over them; a few weed seeds will germinate in the compost over winter

Spacing

Early plantings, in particular, need space for up to five new stems to develop from the one seed. Space at 15–20 cm/6–8 in, in rows which might be 45–50 cm/18–20 in apart. This looks ‘too wide’ at planting time, but is correct by mid-spring.

  • New plantings are widely spaced! There is just time for fast-growing herbs and vegetables to grow before broad beans fill all of the space.
  • You could transplant some lambs lettuce between the plantings of late autumn, and herbs like dill and coriander between the plantings of early spring.

Support

Plants grow up to 1.2 m/4 ft high and sometimes more. They are prone to falling over or leaning in the wind; this rarely causes damage because stems simply lean on the ground and carry on growing and cropping.

However, they take up more space once blown over or leaning/reclining, which obstructs pathways, makes picking harder and may smother other plantings. See the photos for how we contain plants within a bed. Or you could use one stake per plant, tied with strings, a longer job.

27th April – here you can see my method of using posts and two polypropylene strings for support; the strings need to be strong
10th May – broad beans transplanted in November and broccoli transplanted in March; both cropped at the same time, after three frosts in mid-May
26th May – already we’re seeing beans appearing

A top tip

When most of the stems are full of their gorgeous flowers, it works well to pinch out the tops, which you can also eat. There are two reasons why it’s worth removing the growing tips:

  • Stem length is reduced, and plants stand up more strongly as a result.
  • The growing tip is a key landing point for aphids (see below), therefore removing it reduces the risk of pest damage.
28th March – we see lovely broad bean flowers appearing; this is too early to pinch out the tops, before which you want longer stems and, depending on the variety, crammed full of flowers
21st May – pinching out all the broad bean plant tops to reduce aphid landing places, prevent stems growing too long and enjoy some greens

Water

How often

Most water is needed when beans are swelling inside the pods. Before that, it’s good to leave plants alone to encourage deeper rooting. The exception is spring plantings, which you need to water until they are established.

Here at Homeacres, for example, we would not water before May/late spring, once stems are full of flowers. If the weather is very dry at that time you could water quite thoroughly twice a week.

How much

At the fruiting stage, broad beans can use a lot of water because of the plants’ high surface area, with many leaves on tall stems.

Extra mulch to retain moisture?

This is rarely worthwhile because of the short time period when it would actually make a difference, namely from flowering to fruiting, for about a month. Plus, by this time, plants are giving good shade to the soil below.

28th June – unwatered Robin Hood broad beans in cracking soil

Prune plants

How much is needed

As long as your spacing is sufficient to allow strong development of stems and pods, there should be no pruning of stems needed, nor thinning of pods. Plants usually set more pods than they can fill with beans, and then self-prune by defaulting on development of new pods – they seem to know how many beans can come to fruition.

10th May – at six months old the beans are looking abundant, with many flowers
12th May – the beans are now not looking so good after a -2°C/28°F frost, which lasted for several hours

Harvest times and methods

How to judge readiness

Discover your preferred bean taste though trial and error. Pick and eat a few beans when pods are still soft and light green, and the beans inside are small. Then allow them to grow for another two weeks or so, and notice the flavour plus texture difference as beans swell. They will have a higher proportion of middle to skin during this stage.

Then, after another week, beans become drier and more starchy, with more body but less sweetness. After cooking such mature beans, you can remove the skin from each one, with a gentle squeeze of each bean to slide out the bright green middle. A fiddly job but you end up with a very tasty and still substantial dish.

10th May – first pick of tender broad beans, although the skin is bitter at this stage, and the beans inside each skin are too soft to squeeze out
Aquadulce bean pods left unpicked until full of beans, with more weight and starch but still retaining tenderness; this is my favourite harvest stage

How to pick

At the point where the pod joins the stem, you see the now black debris of old flower petals. This is where you push down with the thumb, to detach a pod from the stem without damage to either. Always a downward push, not a pull upwards.

When to pick and how often

Follow your preference of how you like to eat the beans. They ripen first near the ground, so those are the ones to pick first, then a few days later there will be fatter beans inside pods higher up the plant.

It’s quite normal that you see a few half-empty pods, with just one or two beans. They also need picking when swollen, because they can’t grow more beans in any pod once pollination has happened.

Saving seed

Different varieties will cross-pollinate if grown closer than about 15 m/49 ft, so, in most gardens, if you want to save seed it’s best to grow just one variety. The trick is to leave a few plants unpicked, and you could have 20–30 seeds per plant.

Leave them on the plant for up to a month after your last food harvest. They turn dark in colour, even black. After picking the pods, shell out their seeds and leave them in dry warmth, even sunshine, for two to three weeks until really hard.

Late July – these fat bean pods are being dried for seed
Early August – now the process is a little further along, with most leaves decayed and pods turning harder
Early August – a harvest of dry pods; at this stage it’s good to shell out the seeds, for final drying before storing, say in a glass jar

One other harvest

When bean plants are 15–20 cm/6–8 in tall, you can pinch out the tops to eat as shoots. The flavour is strong – stronger than pea shoots for example –  and you can eat them raw or lightly steamed. Harvests will continue for some weeks, particularly in the spring. Repeat picking delays, and ultimately reduces, pod harvests.

Interplant beans between kale plants for shoots in the new year
December – similarly, these broad beans are interplanted amongst salad and beetroot plants
Four-week-old bean transplants, shown here after spreading compost in a bed previously inhabited by beetroot plants

Potential problems

Which pests are likely, and when

Once plants are established, they should be pest-free until mid to late spring. Then suddenly you may notice blackfly or black bean aphids, which arrive in May, usually at the tender tops of plants. They descend while sucking sap and ruining the harvest. Here are my top four remedies:

  1. Sow beans in autumn rather than spring, because plants are tougher by May when the blackfly arrive. Aphids like soft leaves and stems more than firm ones: I find little or no damage on autumn-sown beans here.
  2. Pinch out the tops of plants once you see their stems full of flowers. Aphids then have to search harder for a landing place.
  3. Soil health is key because strong plants are less interesting to pests and diseases.
  4. Plants in May may struggle to find moisture because they are growing so fast, at a time when rainfall may be lacking. Give water to help them resist blackfly.
31st May – you can see blackfly aphids on the beans

Protections needed

Seedlings may need protection from birds such as rooks, which can pull them out in order to eat the seed which is still there at the bottom – see Thermacrop mesh photos below.

Mice like broad bean seeds and seedlings too. If there are mice in your garden, it’s worth sowing beans in module trays under cover, with a mousetrap nearby.

These broad beans were transplanted three months previously and have always lived under this cover, with the occasional reinstatement of stones after high winds
6th March – the Thermacrop is now off, and we spent all of four minutes pulling the few winter weeds

Invisible bean poison

Horse manure and hay are at a small risk of contamination by aminopyralid weedkiller, occasionally sprayed on grass for horse hay. It’s the only weedkiller I know which persists, and it’s lethal to potatoes, tomatoes and legumes, whose growing tips become curled and twisted.

  • Symptoms are mostly on the growing tips of plants, not older leaves. The poison is an auxin hormone disruptor that interferes with new growth.
  • It is horribly persistent and widely used, becoming a tragedy for the environment and gardeners.

Green waste compost and some potting composts may also contain it, from clopyralid weedkiller sprayed on lawns that are cut, and the clippings then taken to composting facilities. It is not broken down by high temperatures or compost microbes, only by soil microbes.

Should your plants show the symptoms, your options of disposal are few, apart from sending plants and compost to landfill. If you send them to recycling, they will contaminate the green waste compost.

There is no fixed time period for its dissipation in soil, it depends on whether there was a mild or concentrated dose. Dow/Corteva advise repeated cultivation but I disagree because this damages the very organisms which do valiant duty in dissipating their ghastly poison.

  • This poison also affects alliums, beet and cucurbit vegetables. It has little effect on brassicas and almost none on sweetcorn, which is a grass.
Starting a bean seed test for aminopyralid in fresh horse manure
Using two-year-old Robin Hood seeds for a pyralid check in fresh horse manure
The effect of aminopyralid on broad beans – this is a mild contamination: larger doses can even stop germination, or turn leaves mostly yellow
Broad beans damaged by aminopyralid in bought manure – this is a bad poisoning and, even if this plant produced, I would not eat the beans

Disease

A bad disease is chocolate spot, but this happens when soil is not fully fertile or moist – not difficult to rectify at the time, with water, or the following year, with compost.

Another cause is sowing too late, which results in beans needing to develop in hot summer weather.

And finally

Clearing

There is a method to removing bean stems.

  • The root system still has a few nodules of nitrogen, although less than is often thought. Nonetheless, the combination of this, together with the value of leaving roots in the soil to decompose and be food for microbes, makes it worth chopping plants at surface level, just below the stem base which has a very fibrous and tough stem.
  • We use a sharp spade to cut through the topmost roots. This causes only a little damage to soil and benefits it from leaving the root system undisturbed.
  • If you cut the stem above ground level, it will regrow small shoots of new plants. However, they come to nothing and so are a waste.

There is no need to spread compost or add amendments after clearing.

Follow

From overwintered bean plants, cleared in early summer, you have almost every option of what to grow next. Spring-sown beans mature later, so there are fewer options – I would check the sowing timeline for ideas.

Mid-June – a final harvest of Aquadulce Claudia, before clearing to transplant chard
21st June – broad bean plants after a final pick, just before clearing and removing the stakes

Beans – Broad/Fava

Vicia faba

Their plant family is the Fabaceae, which includes all the beans and peas we eat as vegetables.

Beans – Broad/Fava

Introduction

Called Fava beans in North America. Here I refer to them as broad beans.

Their plant family is the Fabaceae, which includes all the beans and peas we eat as vegetables. In this same large family are lentils, peanuts, soy beans, acacia, mimosa and wisteria. All these plants can convert air nitrogen to nodules of nitrogen. You see these as pink clusters on the roots of plants when they are growing strongly.

4th June – broad bean pods are part of this wonderful early summer harvest which includes courgettes, cabbage, spring onion and asparagus
Sown in modules in November, then covered with a little compost; these will be ready to transplant in about four weeks when grown under cover
Nitrogen nodules accumulate on the roots of legumes such as peas and beans when plants are growing fast; much of this nitrogen is used by the legume plants themselves

Harvest period

Days from seed to harvest:
110 spring-sown, to 200 autumn-sown

In temperate climates it’s mid-May to early August, say late spring through to midsummer. It’s possible to harvest broad beans in late summer and even autumn, but the harvest at that time is light, compared to the time and space needed.

Later harvests mean plants have used the main part of a growing season, compared to early or pre-winter sowings. They are cleared in early to midsummer, which makes it easier to plant and sow again with another vegetable.

  • Broad beans, sown late October to early November, harvest late May through June.
  • Broad beans, sown February to April, harvest late June through to early August.
26th November – broad beans have just been planted after clearing cabbage
June – after clearing beans we transplant cabbage; by mid-October we have harvested most of the heads and the remaining ones are good to harvest for another month
2nd June – a great harvest of vegetables, with calabrese, cabbage, carrots, salad leaves, and broad beans from the November sowing
  • Best climate is temperate, not continental – moist is good.

Broad beans do not like it too hot. Their pattern of growth means harvests are best when day length is either increasing or still full.

In warm climates, such as Florida, they can crop in spring from sowing just before winter. In even hotter climates, I am unsure about timing, or of success.

In climates of winter frosts, they survive as small plants, at temperatures as low as -8—10 °C/ 8–14 °F. At those temperatures, and colder, some cover is worthwhile: mesh is better than fleece because it’s stronger. Snow protects them too.

22nd February – overwintered broad beans which were sown in early November

25th February – we see a frost on the bean plants of -2°C/28°F, cold enough to make the plants fall over because their stems are now elongating
26th March – broad beans and broccoli in a strong -3°C/27°F frost; they look bad here, but are standing again by midday
17th April – the same broad beans and broccoli, now in full health and growing well

Why grow them

Broad beans are mostly eaten shelled from their pods when green and fresh. They lose moisture and also sweetness with any lapse of time after picking.

Therefore freshly gathered homegrown broad beans have excellent flavour – if you have not eaten them before, do have a try. They are not too difficult to grow.

Unlike other vegetable beans, broad beans are frost hardy, and you can sow them in late autumn which means they crop early in the summer.

Therefore:

  • They are exciting! You enjoy early meals of vegetables with fruits of summer-like flavour, after the root vegetables of winter and leaf vegetables of spring.
  • There is time after clearing the old plants to grow a serious amount of vegetables in the same space. Examples include broccoli, cabbage, leeks, carrots and plenty more
31st May – beans Aquadulce Claudia from a November sowing; the first harvest is now ready with the lowest pods swelling
Mid-June – just two weeks later and Felix Hofmann is clearing bean debris from beds, before we transplant cabbages on the same day
Early July – broccoli plants are ready to transplant after broad beans have been cleared, with water in trenches in preparation

Suitable for containers?

Broad beans are large and hungry plants, with a high proportion of leaf and stem compared to the amount of food produced. This makes them probably not worthwhile to grow in containers, although you could try small varieties such as Robin Hood (see below) and The Sutton.

Conditions for success

Plants mature best before summer grows too hot and dry. They profit from a mild but long spring, when there is time for stems and leaves to develop fully before flowering initiates. This can be as early as May, before summer even begins.

When I lived in Southwest France, broad beans flowered in April and we harvested them in May. I followed them with beet transplants and grew giant fodder beet for the cows in that same year.

This is one of several reasons why autumn sowing is so successful: it ensures the long season of early growth before fruiting. During this time plants also tiller, which means growing several stems from one seed. They then look like multisown broad beans!

  • The take-home point is that broad beans are healthiest and most abundant in mild and moist weather, rather than hot.
13th December – trialing composts containing aminopyralids with broad bean plants; contaminated compost turns out to be in the left half of this tray
30th December – the compost trial continues; see two different varieties – taller Aquadulce Claudia on the left and Robin Hood on the right

Varieties

For sowing in autumn to overwinter, Aquadulce Claudia is perhaps the hardiest, is high yielding and develops great flavour if beans are allowed to mature until white and creamy. It also crops well from sowing by early spring.

Masterpiece Green Longpod has tasty green beans, and Green Windsor has a highly esteemed flavour.

Monica, or de Monica, and Robin Hood grow smaller plants, around 1.2 m/4 ft high, with pods of 4–5 pale-coloured, sweet beans.

Broad Bean Wizard, from Real Seeds, are great over winter, and produce a tasty crop in May, with many small pods.

For something different, there are crimson flowered varieties with pink seeds. The flowering period of all broad beans is a real addition to the garden, with a fine scent and attracting many insects.

Robin Hood broad beans with silky pods
11th June – a feast of spring vegetables! Early dehulled broad bean Aquadulce in the middle

Legumes for freezing – broad beans Karmazyn and Masterpiece Green Longpod, and Alderman peas alongside Sugar Snap

Video

How to grow broad beans

Sow and propagate

For germination, there is no special need for warmth, and for sowing in modules you do not need large pots or root-trainers, just a 4–5 cm/2 in cell cross-section, maybe 5 cm/2 in deep. There must be no rodents in the propagating space.

Homesaved broad bean seeds before soaking
The same broad bean seeds after soaking for 36 hours

Sowing time

From mid-October is possible but the first half of November is better, and again from February through March. Seeds germinate quite slowly and it can be two weeks after sowing before you notice a perky green shoot. Growth should then be steady but still not fast, because it’s usually at a cool time of year.

Also, plants start off very stocky, typical of any which grow in the winter. Compare their look to runner or pole beans (next lesson) whose stems are so long and thin, with large fluffy leaves full of water.

Sowing method

Either direct in the soil if no rodents likely, or in module trays for transplanting at four weeks old.

Pot on?

This should not be necessary, because seedlings grow better in the ground than in pots, after having been transplanted when small. Then they develop a strong and deep root structure early in life.

Peas and broad beans starting to emerge, one to two weeks after sowing in February; these spent their first ten days in the conservatory
This shows the importance of the sowing date in autumn – the broad beans on the left were sown eight days earlier; it also shows a compost trial with homemade one-year-old compost on the right, and Moorland Gold potting compost on the left
Living Green compost broad beans with roots that haven’t been air pruned – these were sitting on air holes for four weeks

Transplant

Propagation under cover is to enable seedlings to pass through the critical phases of germination and growing into small plants, without being eaten. After that, there is no benefit to continuing with growing them under cover. They grow roots in cool conditions and are better in the ground.

Transplant size

Seedlings can be anything from 5–10 cm/2–4 in tall, usually with just one stem from the one seed, at that stage.

  • There is no special soil preparation. This long bed had cropped lettuce through spring and early summer, then we grew chicories for heads of radicchio.
  • We cut the last heads in early November and, after twisting out all of their roots to leave most roots in the bed, we spread 3 cm/about 1 in of homemade compost.
13th December, with day temperatures of 7°C/45°F and sometimes -4°C/25°F at nights; these four to five-week-old bean seedlings have just been transplanted
December – keeping four to five-week-old broad bean seedlings under Thermacrop mesh; the main benefit at this stage is protection from wind

Transplant time

Weather is not a factor as long as the ground is not frozen. You can transplant any time from late autumn to early spring. Unless your summers are cool and damp, transplants in late spring and summer grow less abundantly, probably with more aphid problems too.

20th December – five-week-old broad beans planted deep and with a cloche over them; a few weed seeds will germinate in the compost over winter

Spacing

Early plantings, in particular, need space for up to five new stems to develop from the one seed. Space at 15–20 cm/6–8 in, in rows which might be 45–50 cm/18–20 in apart. This looks ‘too wide’ at planting time, but is correct by mid-spring.

  • New plantings are widely spaced! There is just time for fast-growing herbs and vegetables to grow before broad beans fill all of the space.
  • You could transplant some lambs lettuce between the plantings of late autumn, and herbs like dill and coriander between the plantings of early spring.

Support

Plants grow up to 1.2 m/4 ft high and sometimes more. They are prone to falling over or leaning in the wind; this rarely causes damage because stems simply lean on the ground and carry on growing and cropping.

However, they take up more space once blown over or leaning/reclining, which obstructs pathways, makes picking harder and may smother other plantings. See the photos for how we contain plants within a bed. Or you could use one stake per plant, tied with strings, a longer job.

27th April – here you can see my method of using posts and two polypropylene strings for support; the strings need to be strong
10th May – broad beans transplanted in November and broccoli transplanted in March; both cropped at the same time, after three frosts in mid-May
26th May – already we’re seeing beans appearing

A top tip

When most of the stems are full of their gorgeous flowers, it works well to pinch out the tops, which you can also eat. There are two reasons why it’s worth removing the growing tips:

  • Stem length is reduced, and plants stand up more strongly as a result.
  • The growing tip is a key landing point for aphids (see below), therefore removing it reduces the risk of pest damage.
28th March – we see lovely broad bean flowers appearing; this is too early to pinch out the tops, before which you want longer stems and, depending on the variety, crammed full of flowers
21st May – pinching out all the broad bean plant tops to reduce aphid landing places, prevent stems growing too long and enjoy some greens

Propagation under cover is to enable seedlings to pass through the critical phases of germination and growing into small plants, without being eaten. After that, there is no benefit to continuing with growing them under cover. They grow roots in cool conditions and are better in the ground.

Transplant size

Seedlings can be anything from 5–10 cm/2–4 in tall, usually with just one stem from the one seed, at that stage.

  • There is no special soil preparation. This long bed had cropped lettuce through spring and early summer, then we grew chicories for heads of radicchio.
  • We cut the last heads in early November and, after twisting out all of their roots to leave most roots in the bed, we spread 3 cm/about 1 in of homemade compost.
13th December, with day temperatures of 7°C/45°F and sometimes -4°C/25°F at nights; these four to five-week-old bean seedlings have just been transplanted
December – keeping four to five-week-old broad bean seedlings under Thermacrop mesh; the main benefit at this stage is protection from wind

Transplant time

Weather is not a factor as long as the ground is not frozen. You can transplant any time from late autumn to early spring. Unless your summers are cool and damp, transplants in late spring and summer grow less abundantly, probably with more aphid problems too.

20th December – five-week-old broad beans planted deep and with a cloche over them; a few weed seeds will germinate in the compost over winter

Spacing

Early plantings, in particular, need space for up to five new stems to develop from the one seed. Space at 15–20 cm/6–8 in, in rows which might be 45–50 cm/18–20 in apart. This looks ‘too wide’ at planting time, but is correct by mid-spring.

  • New plantings are widely spaced! There is just time for fast-growing herbs and vegetables to grow before broad beans fill all of the space.
  • You could transplant some lambs lettuce between the plantings of late autumn, and herbs like dill and coriander between the plantings of early spring.

Support

Plants grow up to 1.2 m/4 ft high and sometimes more. They are prone to falling over or leaning in the wind; this rarely causes damage because stems simply lean on the ground and carry on growing and cropping.

However, they take up more space once blown over or leaning/reclining, which obstructs pathways, makes picking harder and may smother other plantings. See the photos for how we contain plants within a bed. Or you could use one stake per plant, tied with strings, a longer job.

27th April – here you can see my method of using posts and two polypropylene strings for support; the strings need to be strong
10th May – broad beans transplanted in November and broccoli transplanted in March; both cropped at the same time, after three frosts in mid-May
26th May – already we’re seeing beans appearing

A top tip

When most of the stems are full of their gorgeous flowers, it works well to pinch out the tops, which you can also eat. There are two reasons why it’s worth removing the growing tips:

  • Stem length is reduced, and plants stand up more strongly as a result.
  • The growing tip is a key landing point for aphids (see below), therefore removing it reduces the risk of pest damage.
28th March – we see lovely broad bean flowers appearing; this is too early to pinch out the tops, before which you want longer stems and, depending on the variety, crammed full of flowers
21st May – pinching out all the broad bean plant tops to reduce aphid landing places, prevent stems growing too long and enjoy some greens

Prune plants

How much is needed

As long as your spacing is sufficient to allow strong development of stems and pods, there should be no pruning of stems needed, nor thinning of pods. Plants usually set more pods than they can fill with beans, and then self-prune by defaulting on development of new pods – they seem to know how many beans can come to fruition.

10th May – at six months old the beans are looking abundant, with many flowers
12th May – the beans are now not looking so good after a -2°C/28°F frost, which lasted for several hours

Harvest times and methods

How to judge readiness

Discover your preferred bean taste though trial and error. Pick and eat a few beans when pods are still soft and light green, and the beans inside are small. Then allow them to grow for another two weeks or so, and notice the flavour plus texture difference as beans swell. They will have a higher proportion of middle to skin during this stage.

Then, after another week, beans become drier and more starchy, with more body but less sweetness. After cooking such mature beans, you can remove the skin from each one, with a gentle squeeze of each bean to slide out the bright green middle. A fiddly job but you end up with a very tasty and still substantial dish.

10th May – first pick of tender broad beans, although the skin is bitter at this stage, and the beans inside each skin are too soft to squeeze out
Aquadulce bean pods left unpicked until full of beans, with more weight and starch but still retaining tenderness; this is my favourite harvest stage

How to pick

At the point where the pod joins the stem, you see the now black debris of old flower petals. This is where you push down with the thumb, to detach a pod from the stem without damage to either. Always a downward push, not a pull upwards.

When to pick and how often

Follow your preference of how you like to eat the beans. They ripen first near the ground, so those are the ones to pick first, then a few days later there will be fatter beans inside pods higher up the plant.

It’s quite normal that you see a few half-empty pods, with just one or two beans. They also need picking when swollen, because they can’t grow more beans in any pod once pollination has happened.

Saving seed

Different varieties will cross-pollinate if grown closer than about 15 m/49 ft, so, in most gardens, if you want to save seed it’s best to grow just one variety. The trick is to leave a few plants unpicked, and you could have 20–30 seeds per plant.

Leave them on the plant for up to a month after your last food harvest. They turn dark in colour, even black. After picking the pods, shell out their seeds and leave them in dry warmth, even sunshine, for two to three weeks until really hard.

Late July – these fat bean pods are being dried for seed
Early August – now the process is a little further along, with most leaves decayed and pods turning harder
Early August – a harvest of dry pods; at this stage it’s good to shell out the seeds, for final drying before storing, say in a glass jar

One other harvest

When bean plants are 15–20 cm/6–8 in tall, you can pinch out the tops to eat as shoots. The flavour is strong – stronger than pea shoots for example –  and you can eat them raw or lightly steamed. Harvests will continue for some weeks, particularly in the spring. Repeat picking delays, and ultimately reduces, pod harvests.

Interplant beans between kale plants for shoots in the new year
December – similarly, these broad beans are interplanted amongst salad and beetroot plants
Four-week-old bean transplants, shown here after spreading compost in a bed previously inhabited by beetroot plants

Potential problems

Which pests are likely, and when

Once plants are established, they should be pest-free until mid to late spring. Then suddenly you may notice blackfly or black bean aphids, which arrive in May, usually at the tender tops of plants. They descend while sucking sap and ruining the harvest. Here are my top four remedies:

  1. Sow beans in autumn rather than spring, because plants are tougher by May when the blackfly arrive. Aphids like soft leaves and stems more than firm ones: I find little or no damage on autumn-sown beans here.
  2. Pinch out the tops of plants once you see their stems full of flowers. Aphids then have to search harder for a landing place.
  3. Soil health is key because strong plants are less interesting to pests and diseases.
  4. Plants in May may struggle to find moisture because they are growing so fast, at a time when rainfall may be lacking. Give water to help them resist blackfly.
31st May – you can see blackfly aphids on the beans

Protections needed

Seedlings may need protection from birds such as rooks, which can pull them out in order to eat the seed which is still there at the bottom – see Thermacrop mesh photos below.

Mice like broad bean seeds and seedlings too. If there are mice in your garden, it’s worth sowing beans in module trays under cover, with a mousetrap nearby.

These broad beans were transplanted three months previously and have always lived under this cover, with the occasional reinstatement of stones after high winds
6th March – the Thermacrop is now off, and we spent all of four minutes pulling the few winter weeds

Invisible bean poison

Horse manure and hay are at a small risk of contamination by aminopyralid weedkiller, occasionally sprayed on grass for horse hay. It’s the only weedkiller I know which persists, and it’s lethal to potatoes, tomatoes and legumes, whose growing tips become curled and twisted.

  • Symptoms are mostly on the growing tips of plants, not older leaves. The poison is an auxin hormone disruptor that interferes with new growth.
  • It is horribly persistent and widely used, becoming a tragedy for the environment and gardeners.

Green waste compost and some potting composts may also contain it, from clopyralid weedkiller sprayed on lawns that are cut, and the clippings then taken to composting facilities. It is not broken down by high temperatures or compost microbes, only by soil microbes.

Should your plants show the symptoms, your options of disposal are few, apart from sending plants and compost to landfill. If you send them to recycling, they will contaminate the green waste compost.

There is no fixed time period for its dissipation in soil, it depends on whether there was a mild or concentrated dose. Dow/Corteva advise repeated cultivation but I disagree because this damages the very organisms which do valiant duty in dissipating their ghastly poison.

  • This poison also affects alliums, beet and cucurbit vegetables. It has little effect on brassicas and almost none on sweetcorn, which is a grass.
Starting a bean seed test for aminopyralid in fresh horse manure
Using two-year-old Robin Hood seeds for a pyralid check in fresh horse manure
The effect of aminopyralid on broad beans – this is a mild contamination: larger doses can even stop germination, or turn leaves mostly yellow
Broad beans damaged by aminopyralid in bought manure – this is a bad poisoning and, even if this plant produced, I would not eat the beans

Disease

A bad disease is chocolate spot, but this happens when soil is not fully fertile or moist – not difficult to rectify at the time, with water, or the following year, with compost.

Another cause is sowing too late, which results in beans needing to develop in hot summer weather.

And finally

Clearing

There is a method to removing bean stems.

  • The root system still has a few nodules of nitrogen, although less than is often thought. Nonetheless, the combination of this, together with the value of leaving roots in the soil to decompose and be food for microbes, makes it worth chopping plants at surface level, just below the stem base which has a very fibrous and tough stem.
  • We use a sharp spade to cut through the topmost roots. This causes only a little damage to soil and benefits it from leaving the root system undisturbed.
  • If you cut the stem above ground level, it will regrow small shoots of new plants. However, they come to nothing and so are a waste.

There is no need to spread compost or add amendments after clearing.

Follow

From overwintered bean plants, cleared in early summer, you have almost every option of what to grow next. Spring-sown beans mature later, so there are fewer options – I would check the sowing timeline for ideas.

Mid-June – a final harvest of Aquadulce Claudia, before clearing to transplant chard
21st June – broad bean plants after a final pick, just before clearing and removing the stakes
sow & propagate

For germination, there is no special need for warmth, and for sowing in modules you do not need large pots or root-trainers, just a 4–5 cm/2 in cell cross-section, maybe 5 cm/2 in deep. There must be no rodents in the propagating space.

Sowing time

From mid-October is possible but the first half of November is better, and again from February through March. Seeds germinate quite slowly and it can be two weeks after sowing before you notice a perky green shoot. Growth should then be steady but still not fast, because it’s usually at a cool time of year.

Also, plants start off very stocky, typical of any which grow in the winter. Compare their look to runner or pole beans (next lesson) whose stems are so long and thin, with large fluffy leaves full of water.

Sowing method

Either direct in the soil if no rodents likely, or in module trays for transplanting at four weeks old.

Pot on?

This should not be necessary, because seedlings grow better in the ground than in pots, after having been transplanted when small. Then they develop a strong and deep root structure early in life.

No items found.
This is some text inside of a div block.
Transplant - Size, Time Of Year, Spacing, Support
This is some text inside of a div block.

Propagation under cover is to enable seedlings to pass through the critical phases of germination and growing into small plants, without being eaten. After that, there is no benefit to continuing with growing them under cover. They grow roots in cool conditions and are better in the ground.

Transplant size

Seedlings can be anything from 5–10 cm/2–4 in tall, usually with just one stem from the one seed, at that stage.

  • There is no special soil preparation. This long bed had cropped lettuce through spring and early summer, then we grew chicories for heads of radicchio.
  • We cut the last heads in early November and, after twisting out all of their roots to leave most roots in the bed, we spread 3 cm/about 1 in of homemade compost.

Transplant time

Weather is not a factor as long as the ground is not frozen. You can transplant any time from late autumn to early spring. Unless your summers are cool and damp, transplants in late spring and summer grow less abundantly, probably with more aphid problems too.

Spacing

Early plantings, in particular, need space for up to five new stems to develop from the one seed. Space at 15–20 cm/6–8 in, in rows which might be 45–50 cm/18–20 in apart. This looks ‘too wide’ at planting time, but is correct by mid-spring.

  • New plantings are widely spaced! There is just time for fast-growing herbs and vegetables to grow before broad beans fill all of the space.
  • You could transplant some lambs lettuce between the plantings of late autumn, and herbs like dill and coriander between the plantings of early spring.

Support

Plants grow up to 1.2 m/4 ft high and sometimes more. They are prone to falling over or leaning in the wind; this rarely causes damage because stems simply lean on the ground and carry on growing and cropping.

However, they take up more space once blown over or leaning/reclining, which obstructs pathways, makes picking harder and may smother other plantings. See the photos for how we contain plants within a bed. Or you could use one stake per plant, tied with strings, a longer job.

A top tip

When most of the stems are full of their gorgeous flowers, it works well to pinch out the tops, which you can also eat. There are two reasons why it’s worth removing the growing tips:

  • Stem length is reduced, and plants stand up more strongly as a result.
  • The growing tip is a key landing point for aphids (see below), therefore removing it reduces the risk of pest damage.
No items found.
Water

How often

Most water is needed when beans are swelling inside the pods. Before that, it’s good to leave plants alone to encourage deeper rooting. The exception is spring plantings, which you need to water until they are established.

Here at Homeacres, for example, we would not water before May/late spring, once stems are full of flowers. If the weather is very dry at that time you could water quite thoroughly twice a week.

How much

At the fruiting stage, broad beans can use a lot of water because of the plants’ high surface area, with many leaves on tall stems.

Extra mulch to retain moisture?

This is rarely worthwhile because of the short time period when it would actually make a difference, namely from flowering to fruiting, for about a month. Plus, by this time, plants are giving good shade to the soil below.

No items found.
No Images for this section
1
feed
No items found.
This is some text inside of a div block.
Container Growing
No items found.
This is some text inside of a div block.
Prune & Train Plants/Thin Fruit

How much is needed

As long as your spacing is sufficient to allow strong development of stems and pods, there should be no pruning of stems needed, nor thinning of pods. Plants usually set more pods than they can fill with beans, and then self-prune by defaulting on development of new pods – they seem to know how many beans can come to fruition.

No items found.
This is some text inside of a div block.
Harvest Times & Method

Picking pods entails a value judgement, according to how you like your beans to taste. A few people enjoy baby pods with almost no bean inside, like a mangetout broad bean. My preference is for mature and larger beans.

How to judge readiness

Discover your preferred bean taste though trial and error. Pick and eat a few beans when pods are still soft and light green, and the beans inside are small. Then allow them to grow for another two weeks or so, and notice the flavour plus texture difference as beans swell. They will have a higher proportion of middle to skin during this stage.

Then, after another week, beans become drier and more starchy, with more body but less sweetness. After cooking such mature beans, you can remove the skin from each one, with a gentle squeeze of each bean to slide out the bright green middle. A fiddly job but you end up with a very tasty and still substantial dish.

How to pick

At the point where the pod joins the stem, you see the now black debris of old flower petals. This is where you push down with the thumb, to detach a pod from the stem without damage to either. Always a downward push, not a pull upwards.

When to pick and how often

Follow your preference of how you like to eat the beans. They ripen first near the ground, so those are the ones to pick first, then a few days later there will be fatter beans inside pods higher up the plant.

It’s quite normal that you see a few half-empty pods, with just one or two beans. They also need picking when swollen, because they can’t grow more beans in any pod once pollination has happened.

Saving Seed

Different varieties will cross-pollinate if grown closer than about 15 m/49 ft, so, in most gardens, if you want to save seed it’s best to grow just one variety. The trick is to leave a few plants unpicked, and you could have 20–30 seeds per plant.

Leave them on the plant for up to a month after your last food harvest. They turn dark in colour, even black. After picking the pods, shell out their seeds and leave them in dry warmth, even sunshine, for two to three weeks until really hard.

One other harvest

When bean plants are 15–20 cm/6–8 in tall, you can pinch out the tops to eat as shoots. The flavour is strong – stronger than pea shoots for example –  and you can eat them raw or lightly steamed. Harvests will continue for some weeks, particularly in the spring. Repeat picking delays, and ultimately reduces, pod harvests.

No items found.
This is some text inside of a div block.
Potential Problems

Which pests are likely, and when

Once plants are established, they should be pest-free until mid to late spring. Then suddenly you may notice blackfly or black bean aphids, which arrive in May, usually at the tender tops of plants. They descend while sucking sap and ruining the harvest. Here are my top four remedies:

  1. Sow beans in autumn rather than spring, because plants are tougher by May when the blackfly arrive. Aphids like soft leaves and stems more than firm ones: I find little or no damage on autumn-sown beans here.
  2. Pinch out the tops of plants once you see their stems full of flowers. Aphids then have to search harder for a landing place.
  3. Soil health is key because strong plants are less interesting to pests and diseases.
  4. Plants in May may struggle to find moisture because they are growing so fast, at a time when rainfall may be lacking. Give water to help them resist blackfly.

Protections needed

Seedlings may need protection from birds such as rooks, which can pull them out in order to eat the seed which is still there at the bottom – see Thermacrop mesh photos below.

Mice like broad bean seeds and seedlings too. If there are mice in your garden, it’s worth sowing beans in module trays under cover, with a mousetrap nearby.

Invisible bean poison

Horse manure and hay are at a small risk of contamination by aminopyralid weedkiller, occasionally sprayed on grass for horse hay. It’s the only weedkiller I know which persists, and it’s lethal to potatoes, tomatoes and legumes, whose growing tips become curled and twisted.

  • Symptoms are mostly on the growing tips of plants, not older leaves. The poison is an auxin hormone disruptor that interferes with new growth.
  • It is horribly persistent and widely used, becoming a tragedy for the environment and gardeners.

Green waste compost and some potting composts may also contain it, from clopyralid weedkiller sprayed on lawns that are cut, and the clippings then taken to composting facilities. It is not broken down by high temperatures or compost microbes, only by soil microbes.

Should your plants show the symptoms, your options of disposal are few, apart from sending plants and compost to landfill. If you send them to recycling, they will contaminate the green waste compost.

There is no fixed time period for its dissipation in soil, it depends on whether there was a mild or concentrated dose. Dow/Corteva advise repeated cultivation but I disagree because this damages the very organisms which do valiant duty in dissipating their ghastly poison.

  • This poison also affects alliums, beet and cucurbit vegetables. It has little effect on brassicas and almost none on sweetcorn, which is a grass.

Disease

A bad disease is chocolate spot, but this happens when soil is not fully fertile or moist – not difficult to rectify at the time, with water, or the following year, with compost.

Another cause is sowing too late, which results in beans needing to develop in hot summer weather.

No items found.
This is some text inside of a div block.

Clearing

There is a method to removing bean stems.

  • The root system still has a few nodules of nitrogen, although less than is often thought. Nonetheless, the combination of this, together with the value of leaving roots in the soil to decompose and be food for microbes, makes it worth chopping plants at surface level, just below the stem base which has a very fibrous and tough stem.
  • We use a sharp spade to cut through the topmost roots. This causes only a little damage to soil and benefits it from leaving the root system undisturbed.
  • If you cut the stem above ground level, it will regrow small shoots of new plants. However, they come to nothing and so are a waste.

There is no need to spread compost or add amendments after clearing.

Follow

From overwintered bean plants, cleared in early summer, you have almost every option of what to grow next. Spring-sown beans mature later, so there are fewer options – I would check the sowing timeline for ideas.

Mid-June – a final harvest of Aquadulce Claudia, before clearing to transplant chard
21st June – broad bean plants after a final pick, just before clearing and removing the stakes